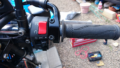
あるZ乗りの先輩から、イグニッションコイル(以下IGコイル)のパワー不足には、リレーをつないでバッテリーから直接電気を供給するとよい」と教えて頂いたので、早速試してみることに。
A senior Z rider told me that to address the power shortage of the ignition coil (hereinafter IG coil), it’s good to connect a relay and supply electricity directly from the battery, so I decided to try it right away.
そもそも、オートバイのスパークプラグは、どのように点火しているのか。
First of all, how do motorcycle spark plugs ignite?
クランクシャフトの延長上には、点火タイミングを決めるスイッチがついている。
On the extension of the crankshaft, there is a switch that determines the ignition timing.
Z1やZ1000、Z1Rなど丸型のヘッドを持つZは、ここが接点式で、いわゆるスイッチになっているので、ゆっくりクランキングすれば、部品同士がくっついたり、離れたりするのが見える。
In Zs with round heads like the Z1, Z1000, and Z1R, this is a contact type, essentially a switch. If you crank slowly, you can see the parts touching and separating.
マニュアルにはコンタクトブレーカーポイントと書いており、俗にいう「ポイント式」というのは、こちらのこと。
The manual refers to this as the contact breaker point, commonly known as the “point type.”
一方、Mk2やZ1R-IIはポイント式から物理的な接点を持たないフルトランジスタ方式で「フルトラ式」というのが、コレのこと。
On the other hand, the Mk2 and Z1R-II have a full transistor system without physical contacts, known as the “full transistor type.”
ポイントのかわりに、ピックアップコイルと呼ばれるパーツがついている。
Instead of points, they have a part called a pickup coil.
エレキギター持っている人ならピンとくるかと思うけど、まさにあのピックアップコイルと同じで、弦の動き(エンジンの動き)を拾って(ピックアップして)、ON/OFF情報を伝える。
If you own an electric guitar, you might recognize it—just like those pickup coils, it picks up (detects) the movement of the strings (engine) and transmits ON/OFF information.
その後、イグナイターなどを経由しながら(我が家のZ1Rは、ピックアップの部分がDYNAに変えており、イグナイターは撤去している)、IGコイルへ向かう。
After that, the signal goes through the igniter, etc. (my Z1R has had the pickup part replaced with DYNA, and the igniter has been removed), heading to the IG coil.
IGコイルはバッテリーからハーネスを経由してやってきた12Vを数万Vまで上げて、エネルギーを点火プラグに送り込む。
The IG coil takes the 12V that came from the battery through the harness and raises it to tens of thousands of volts, sending the energy to the spark plug.
書くだけも、これだけのプロセスを経ているので、途中で減衰する可能性は否定できない。
Even just writing it down, you can see that it’s going through quite a process, so the possibility of attenuation along the way can’t be denied.
ちなみに、配線図を追いかけると、こんな感じです。
By the way, this is how the wiring diagram looks if you follow it.
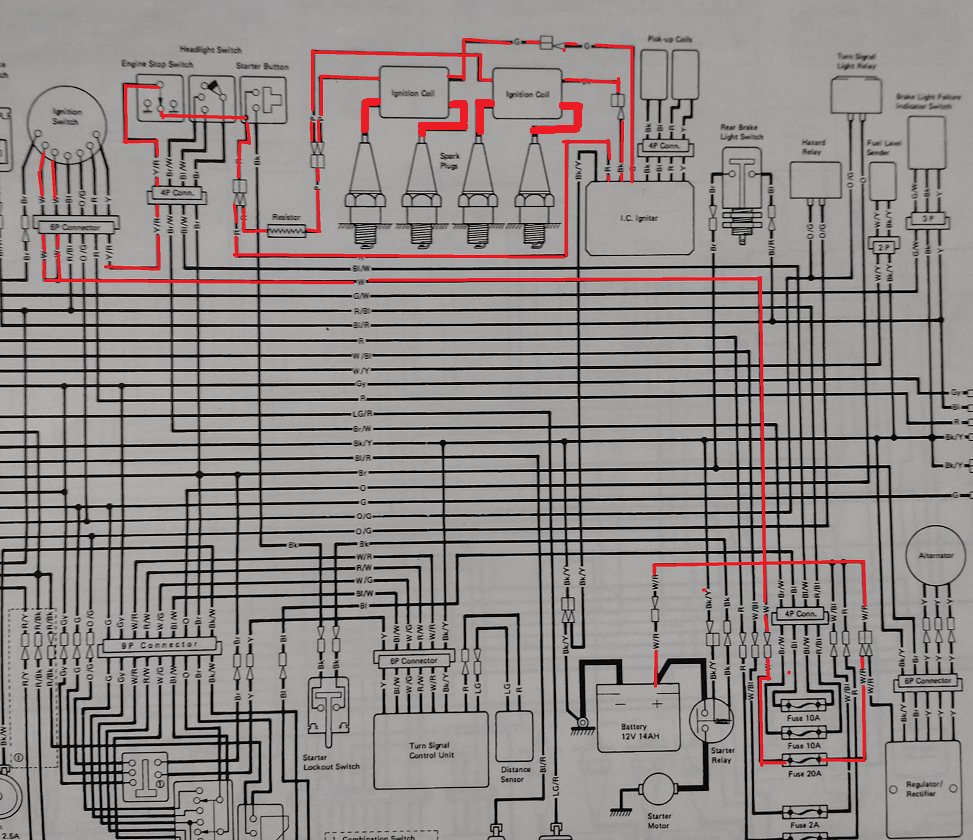
バッテリーからキー周り、ハンドルスイッチを経由してIGコイルに突入しているから、結構な長旅。
The power travels quite a distance, from the battery through the key area and handle switch before reaching the IG coil.
それを、バッテリーからIGコイルに直接電気を送ろうというのが「IGコイルバッ直」です。
The idea of sending electricity directly from the battery to the IG coil is called “IG coil direct wiring.”
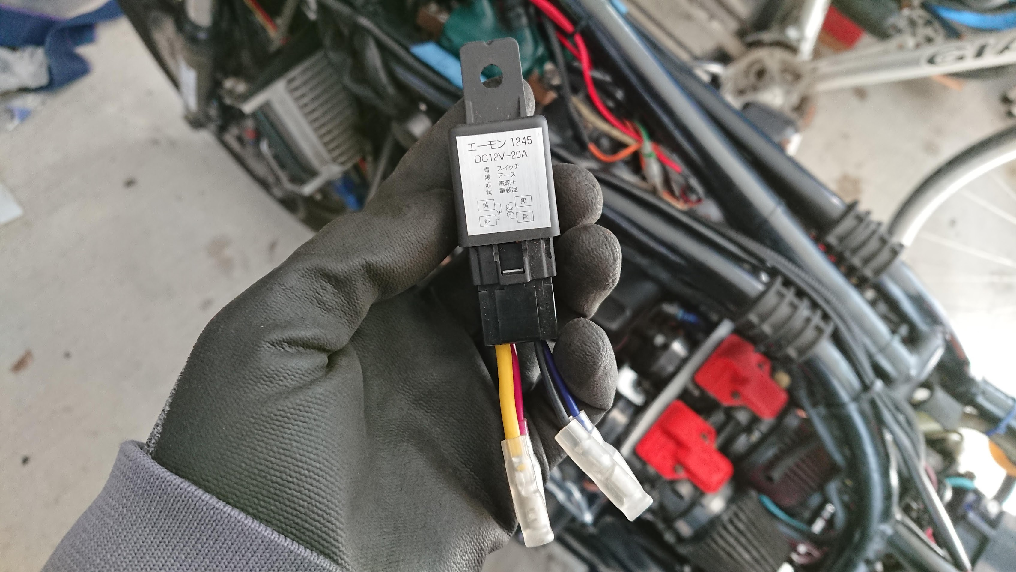
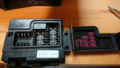
うまい具合に、ジャンクパーツの箱からリレーを発見。
Luckily, I found a relay in a box of junk parts.
何本かギボシ付きの配線が伸びていたので、そのまま流用。
Some wires with connectors were attached, so I reused them as they were.
多分、これだけで20分くらい短縮できたかも。
This probably saved me about 20 minutes.
きちんとした配線図は描けないので、落書きしながら確認。
I can’t draw a proper wiring diagram, so I checked it while doodling.
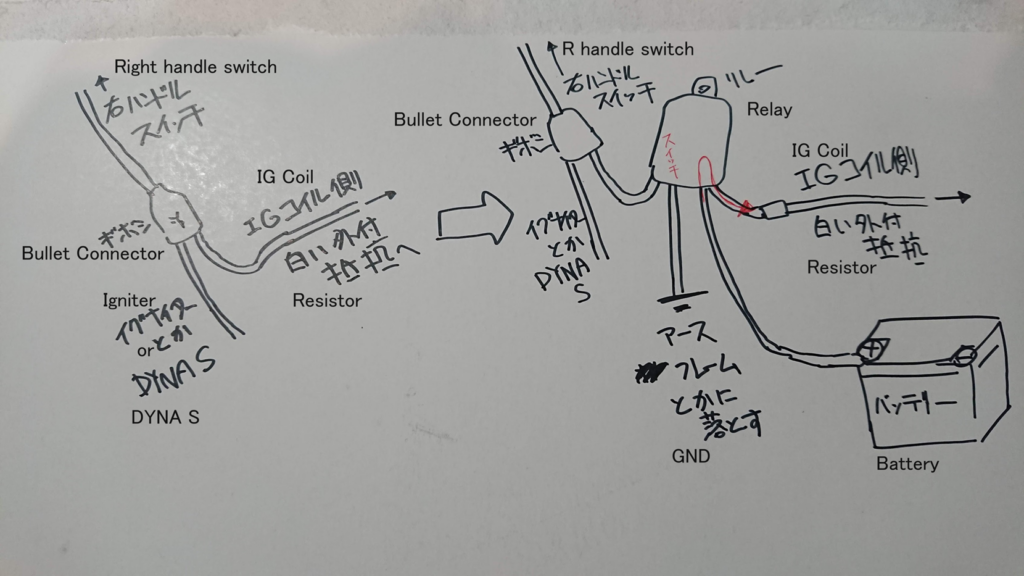
文系なのがバレバレ
It’s obvious that I’m more of a humanities person.
分かりますかね(笑)?
Can you understand it (laughs)?
ピックアップコイルから「点火せよ」と指示が来た場合、さっきも説明したように、バッテリーからグルリと回ってIGコイルに電気がやってくる。
When the pickup coil sends an “ignite” signal, as I explained earlier, electricity comes all the way from the battery to the IG coil.
それを「点火せよ」の指示が来たら、リレーがONになり、バッテリーから直接IGコイルに電気が走って減衰を極力少なくする。
When the “ignite” signal is received, the relay turns ON, and electricity runs directly from the battery to the IG coil, minimizing attenuation.
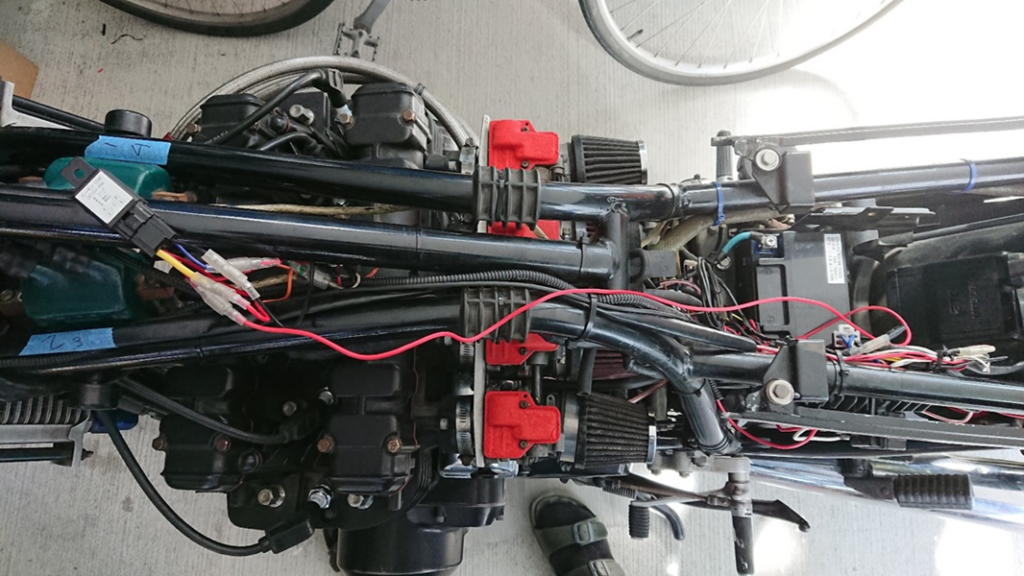
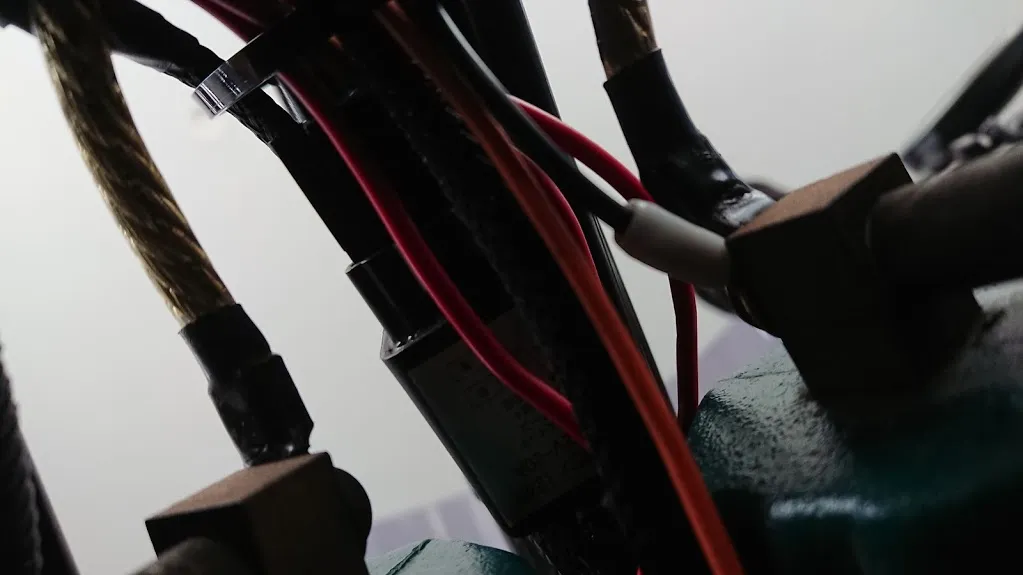
この時点では、慌てて配線はカットしないのがコツ。
At this point, the trick is not to cut the wires in a hurry.
リレーの置き場所、配線が急激にRを描いてないかどうかを吟味してから、長さを決めるのが吉。
It’s best to decide the length after examining the relay’s placement and ensuring the wires aren’t making sharp bends.
プロの整備士は過不足なくキレイに収めるけど、我々のような素人は後でレイアウト変更することも多いので、ある程度余裕があった方が良いかと。
Professional mechanics can do it neatly without excess or shortage, but for amateurs like us, it’s better to leave some slack because we often change the layout later.
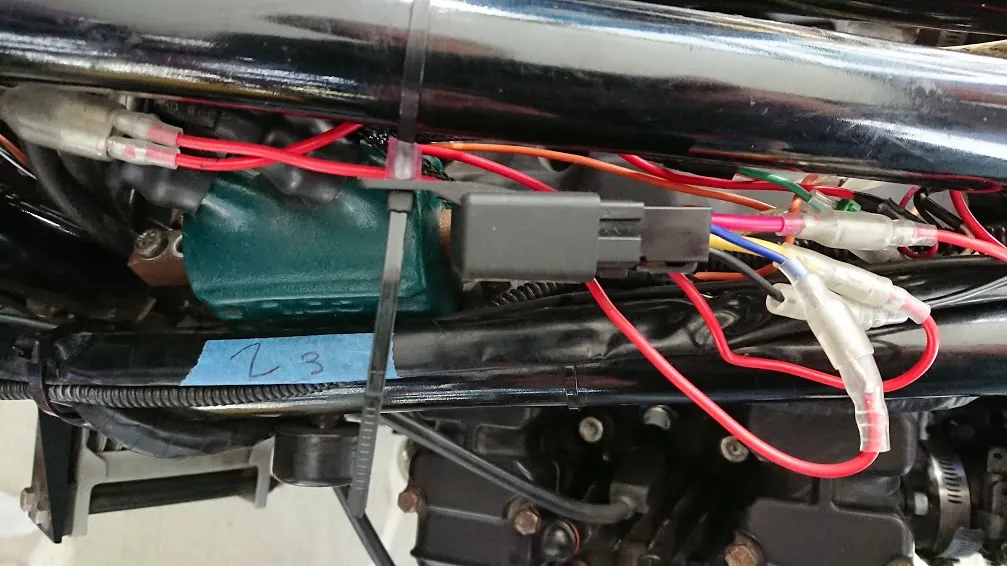
リレー本体は、お得意のゴムチューブと結束バンドで「フローティング加工」。
The relay body is “floating processed” with my favorite rubber tube and cable ties.
ラバーマウントと同じ状態になるので、割とオススメ。
It becomes like a rubber mount, so it’s quite recommended.
ちょうどフレームの真ん中の下につるす感じで設置。
I installed it so that it hangs just below the center of the frame.
アースは他のサイト作例を参考にして、IGコイルのブラケット(?)に共締めすると配線が短くて済む。
For GND, I followed examples from other sites and co-tightened it with the IG coil bracket (?), which shortens the wiring.
アーシングだけは立派な配線だが、そんなに大容量の電気が流れる箇所ではないので、他の配線と同じ太さで構わないという。
The grounding wire is a solid wire, but it’s not a place where large amounts of electricity flow, so the same thickness as other wires is fine.
バッテリーから直接エネルギーを供給する場合、ヘッドライトブースターも同じだけど、トラブルがあると大変なのでバッテリーから出る配線にはフューズを挟めた方がいい。ETCとかもそうなっているはず。
When supplying energy directly from the battery, like with a headlight booster, it’s important to insert a fuse in the wiring from the battery to avoid trouble. This should also be the case for ETC, etc.
で、いよいよ実験開始。
So, the experiment finally began.
実際、どうなのかというと、まず始動性が激変した。
In reality, the starting performance drastically changed.
昨日から調子が戻ったエンジンだが、IGオンの後「キシュン、キシュン」とセルモーターが2、3回仕事してからの点火だった。
The engine, which had been running smoothly since yesterday, used to ignite after the starter motor cranked two or three times following IG ON.
が、今日は最近はやりの「スタートボタン搭載車」のように、ポチっとボタンを押した瞬間に火が入った。
But today, like the recent trend of cars with a start button, it ignited the moment I pressed the button.
冷えているエンジンが、こんな風に始動したことあっただろうか?
Has the cold engine ever started like this?
これは本当にスゴイ。
This is truly amazing.
そして、さらに低速、低回転での安定性が変わった。
Furthermore, the stability at low speeds and low RPMs has changed.
例えが正しいか分からないが、これまでのアイドリングは「筋肉隆々、誰よりも力持ちだけど、めちゃくちゃ不器用で力加減がヘタクソなヤツが、細かい手作業をやってる感じ」で、おっかなびっくりというか、どこまで回転数を下げてやればいいのか分からない、といった雰囲気だった。
I don’t know if this analogy is accurate, but the idling used to feel like “a muscular, strong person who is very clumsy and bad at controlling their strength doing delicate handwork,” unsure of how much to lower the RPMs.
が、いまは「緩急を投げ分けられる一流のピッチャー」のように、100マイルも投げられるが、80マイル以下の変化球でもしっかりコントロールするような。
But now, it’s like “a top-class pitcher who can throw both fastballs at 100 mph and controlled breaking balls below 80 mph.”
まったくもって「無理矢理回転数を落としている」感じがしない。
It doesn’t feel like the RPMs are being forcibly lowered at all.
ギアの選択ミスで、普通ならノッキングするようなシチュエーションでも、しっかりと粘り強く回ってくれる。
Even in situations where a gear selection mistake would normally cause knocking, it runs steadily.
街乗り中心なので、ストップ&ゴー、低回転・低速が続いてもストレスなく乗れるのが良い。
Since it’s mostly city riding, it’s nice to ride without stress even with stop-and-go, low RPM, and low speeds.
スローからのメインにも谷間がなく、アクセル開度と正比例するような感じだ。
There’s no dip from slow to main, and it feels proportional to the throttle opening.
もし加工に自信がない場合は、こちらの商品を買うと機能的には全く同じで、確実です。
If you’re not confident in modifying, buying this product will give you the exact same functionality with certainty.
PMC PAMSイグニッションスタビライザー カワサキ汎用
PMC PAMS Ignition Stabilizer for Kawasaki General Use
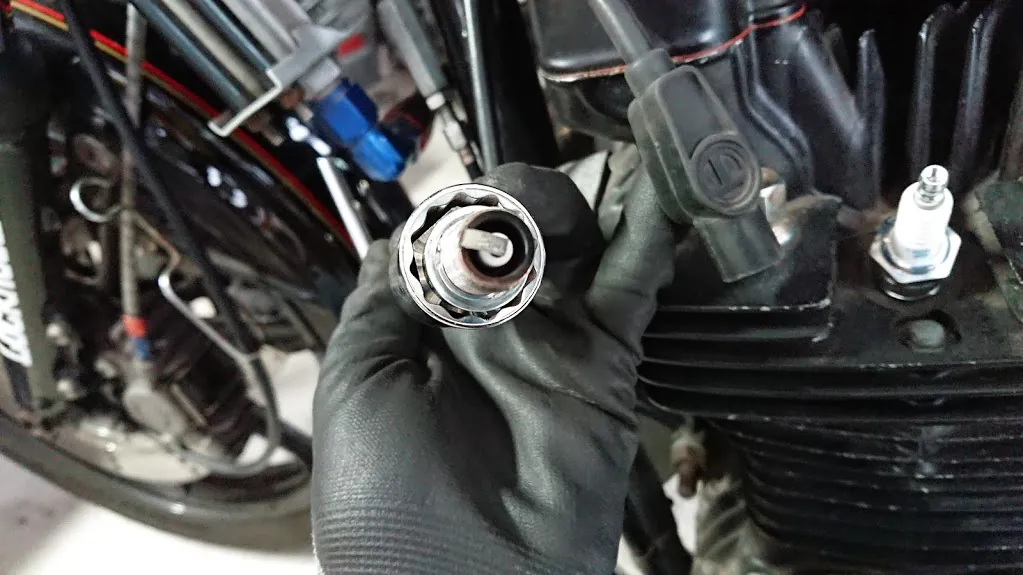
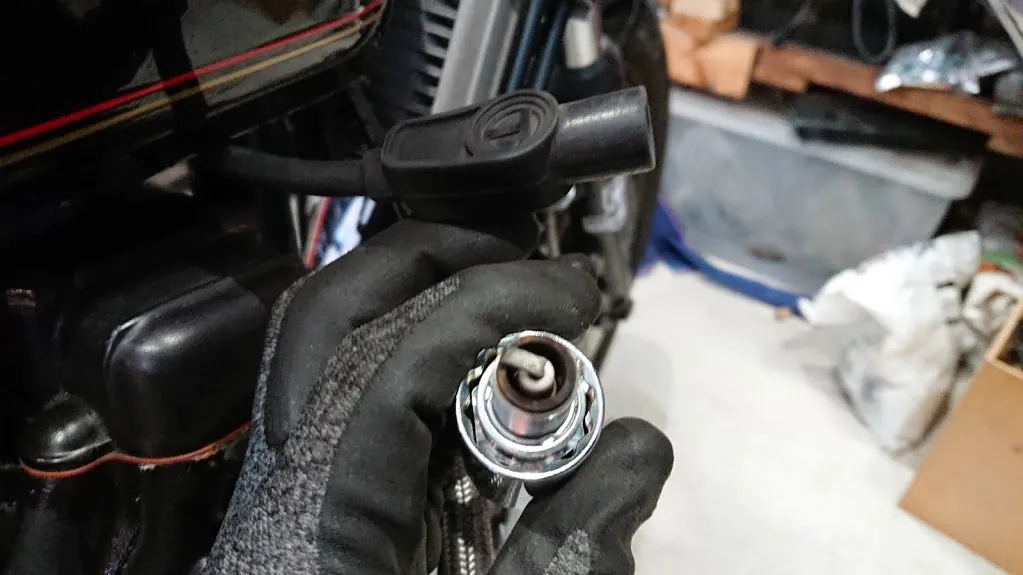
上の写真は、スパークプラグの焼け具合。
The above photo shows the condition of the spark plug.
といっても、焼け具合を診ているのではなく、カーボンがたまっていないか(PSの戻し量)を確認しただけ。
But I’m not checking the burn condition; I just confirmed that there’s no carbon buildup (PS return amount).
俗にいう「プラグの焼け具合」というのは、ストリートで乗っている分には、判断は出来ないらしい。
What is commonly called the “plug burn condition” can’t be judged from street riding, it seems.
レーサーみたいに走り終わった頃、キルスイッチを切ってピットに戻るようなやり方じゃないと正確には分からないのだそうだ。
It seems you can’t accurately tell unless you do it like racers who turn off the kill switch and return to the pit after riding.
若干、煤がついている?と心配したが、おそらくデポジットが付着したんだと思う(PSは、だいたい3/4回転戻し)。
I was worried that there might be some soot, but it’s probably just deposits (PS is about 3/4 turn back).
もう少し距離を出さないと分からないのかもしれないが、煤けているというよりも「こんがり焼けている」気がするので、割とうまくいったんじゃないかと思うのだが、どうでしょう?
It might take a bit more distance to be sure, but it feels more like “nicely toasted” than sooty, so I think it went quite well. What do you think?
コメント