キャブのオーバーフローも停まり、IGコイルも新品。
The carb overflow stopped, and the IG coil is also new.
あとは、走り出すだけ…のはずが何故か火が入らない。
All that’s left is to start riding, but for some reason, it won’t ignite.
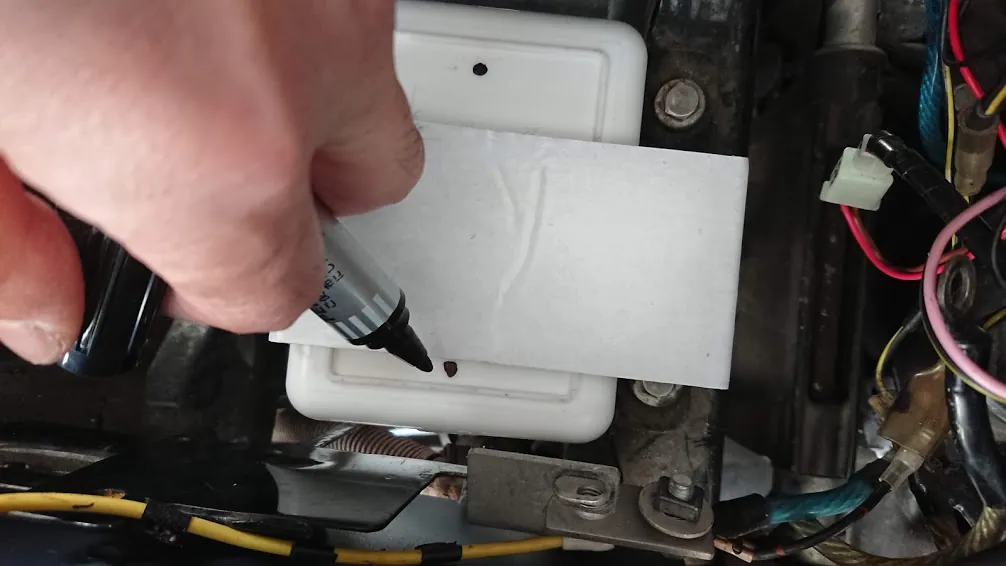
サブタンク(点滴みたいに吊るしてキャブにガソリンを入れるヤツ)の使い方が悪くてキャブに十分なガソリンが行き渡らない時もあった。
Sometimes, the use of the sub-tank (the one that hangs like an IV and feeds gas into the carb) was poor, and the carb didn’t get enough gas.
それと気づかず、セルモーターを回すものだからバッテリーがヘタってしまい、点火に回すエネルギー供給が追い付かなくなったり。
Without realizing it, I kept turning the starter motor, which drained the battery and couldn’t supply enough energy for ignition.
この時はクランキングはしても、スパークプラグは点火しない。
At this time, even though it was cranking, the spark plug wasn’t igniting.
旧車だけではなく、現行車両でも同じ。
This isn’t just an issue with old cars, but with current models too.
復旧させるにはクルマや他のバイクもしくはジャンプスターターに接続してみる。
To restore it, connect it to a car, another bike, or a jump starter.
これでかかれば、バッテリーの不具合となる。
If it starts with this, the problem is the battery.
残念ながら、我が家は敷地内に駐車場がないため、クルマからのジャンプスタートは不可能。
Unfortunately, we don’t have a parking space on our property, so jump-starting from a car is impossible.
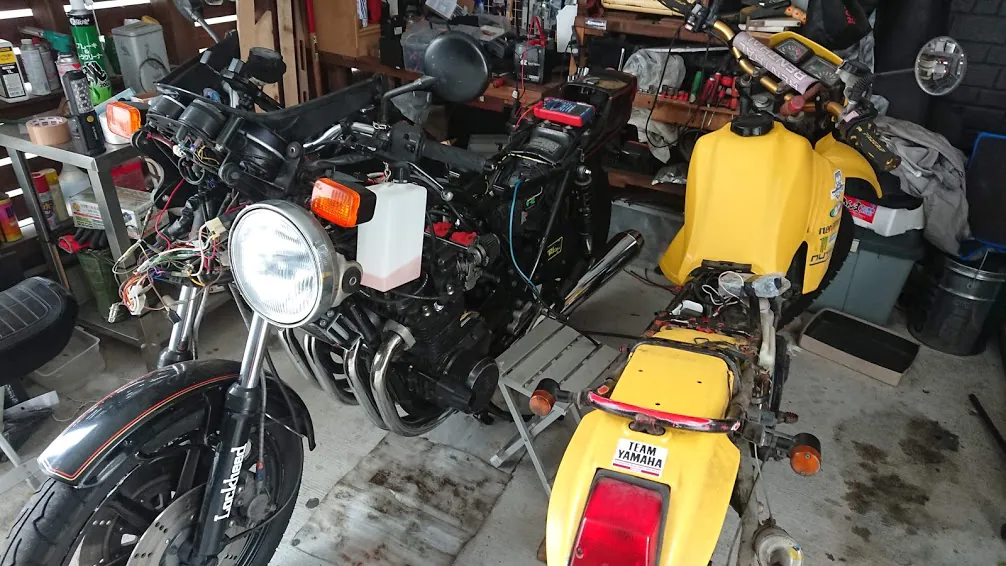
というわけでCDIを新調してから絶好調のDT125Rに、ジャンプスタートをサポートしてもらう。
So, after renewing the CDI, I had the perfectly running DT125R support the jump start.
これでもダメ。
Even this didn’t work.
どんどん迷宮入りしてしまったプレッシャーのせいで正常な思考が出来なくなったのでしょう。
The pressure of getting more and more lost in the maze made it impossible to think clearly.
気が付いたら、やってしまいましたね。
Before I knew it, I had done it.
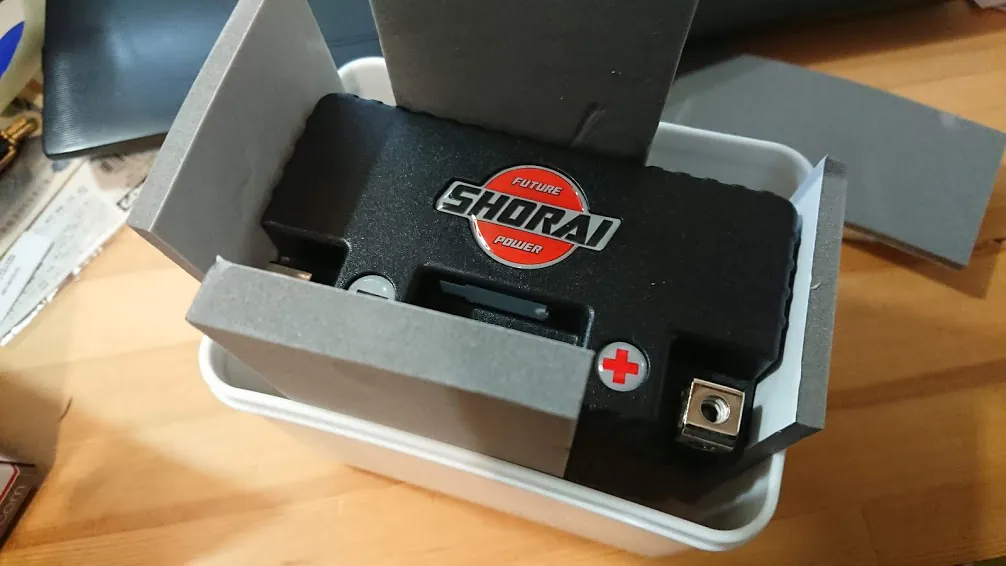
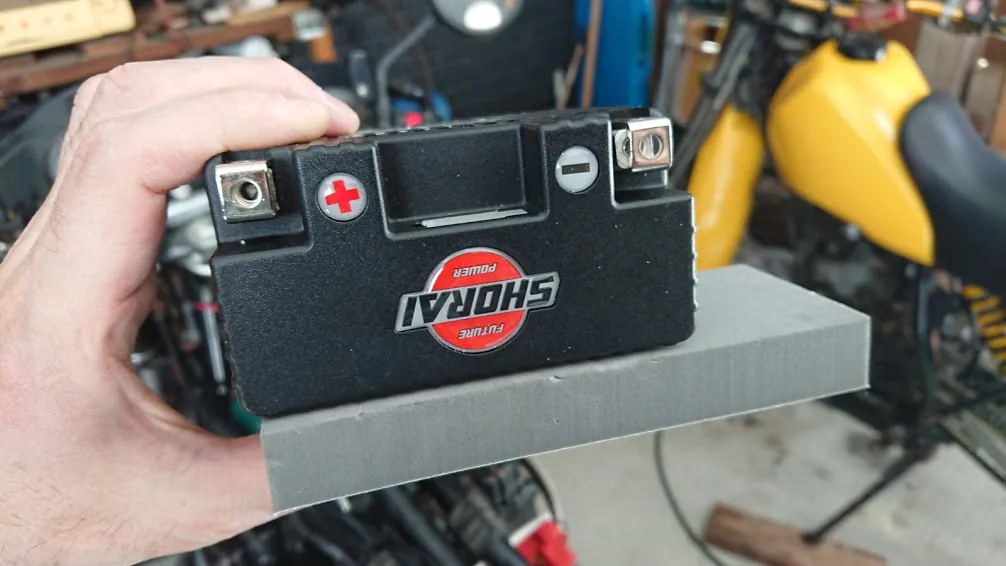
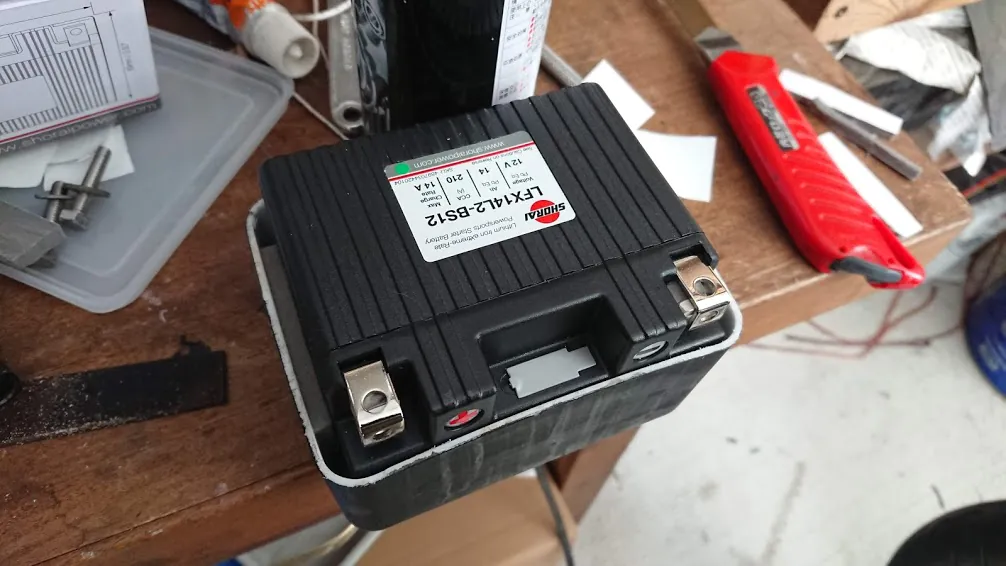
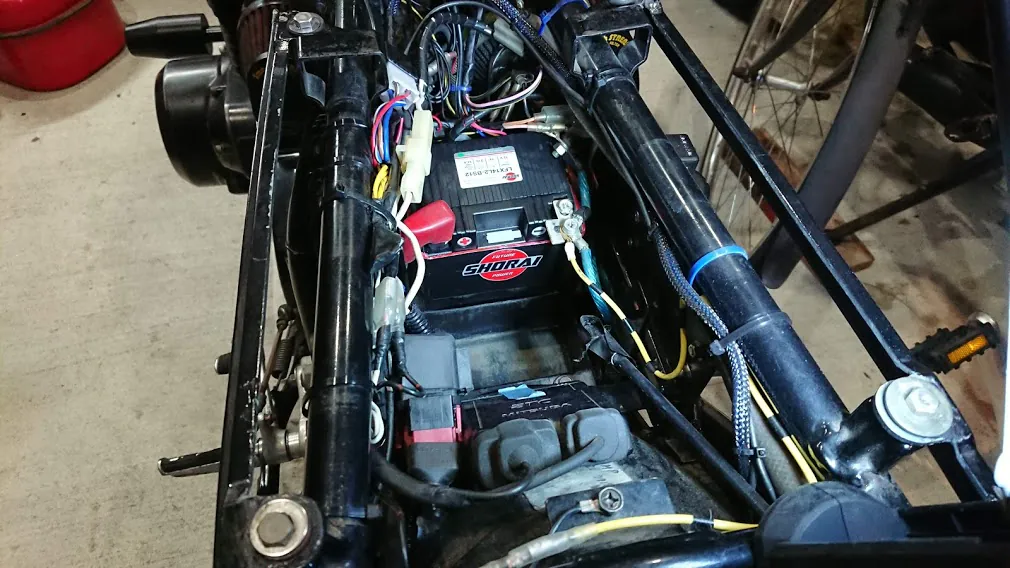
ついに我が家にもお目見えしたリチウム・フェライトバッテリー。
Finally, a lithium-ferrite battery has made its appearance in our home.
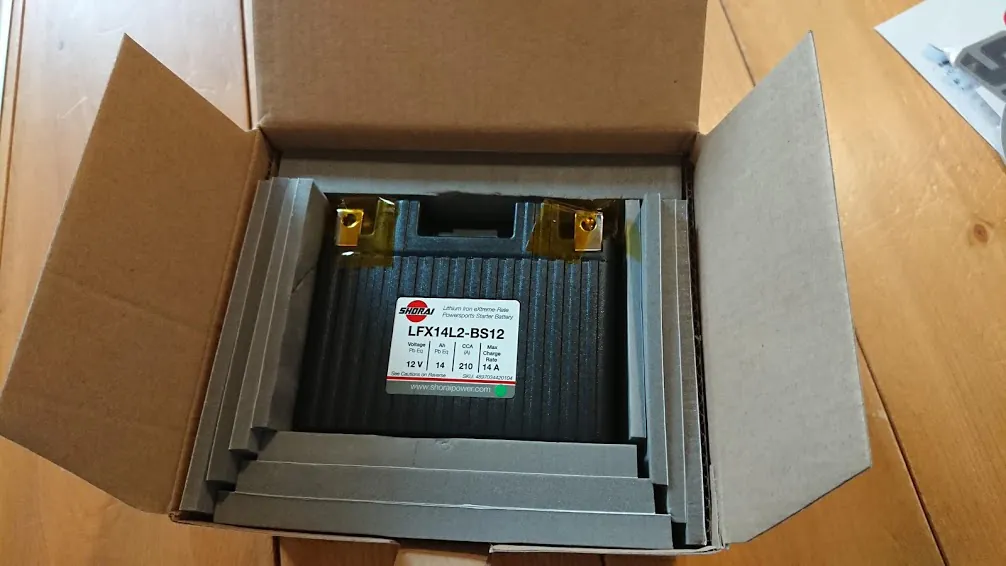
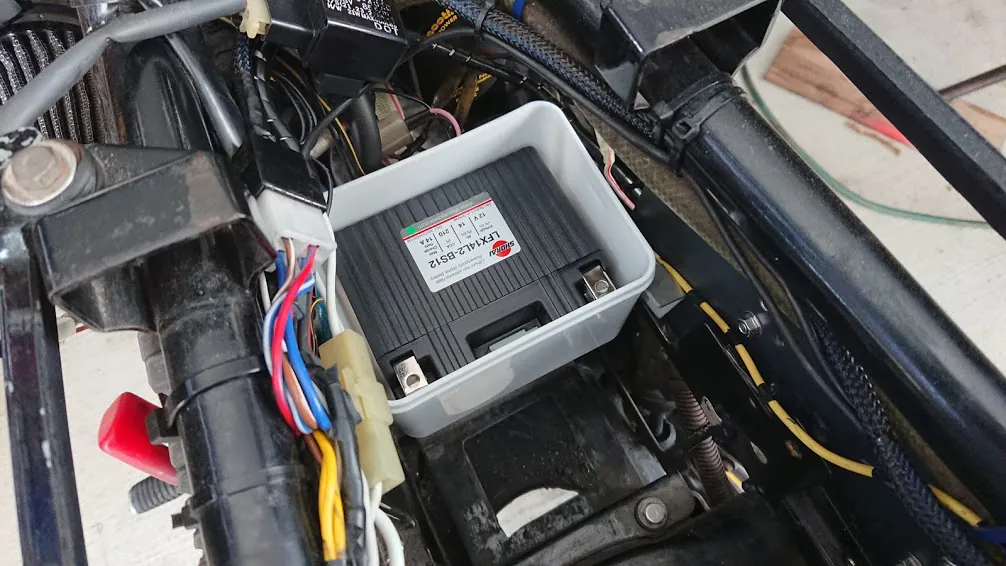
LFX14L2-BS12
従来のMFバッテリーと同じサイズの製品もあるのだけど、せっかくなので小さい方を購入。
There are products the same size as conventional MF batteries, but I decided to go for the smaller one since I was at it.
性能的には一緒なので、そこは好みでいいんじゃないだろうか。
The performance is the same, so it’s just a matter of preference.
「どれだけ違うの?」と聞かれたら、これだけ違う。
If asked, “How different is it?” it’s this different.
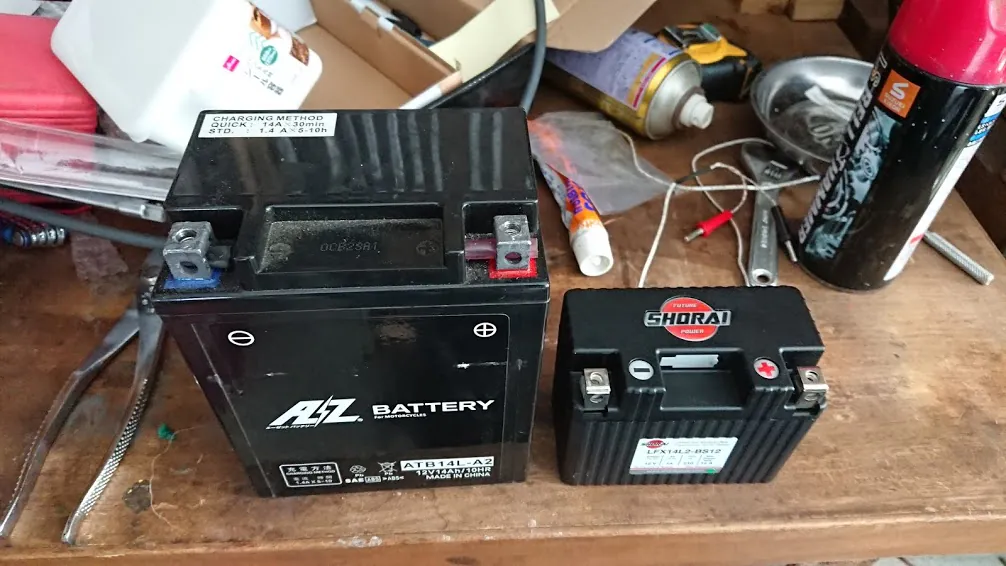
もちろん重さも全然違う。
Of course, the weight is completely different.
MFバッテリーが約3kg。
The MF battery is about 3kg.
作業台から爪先に落としたら、まず間違いなく大ケガする。
If dropped from the workbench onto your toe, it would definitely cause a serious injury.
その重さゆえに、車体から取り出すのもおっくうになる。
Because of its weight, it’s cumbersome to remove it from the vehicle.
一方のリチウムバッテリーはというと…
On the other hand, the lithium battery…
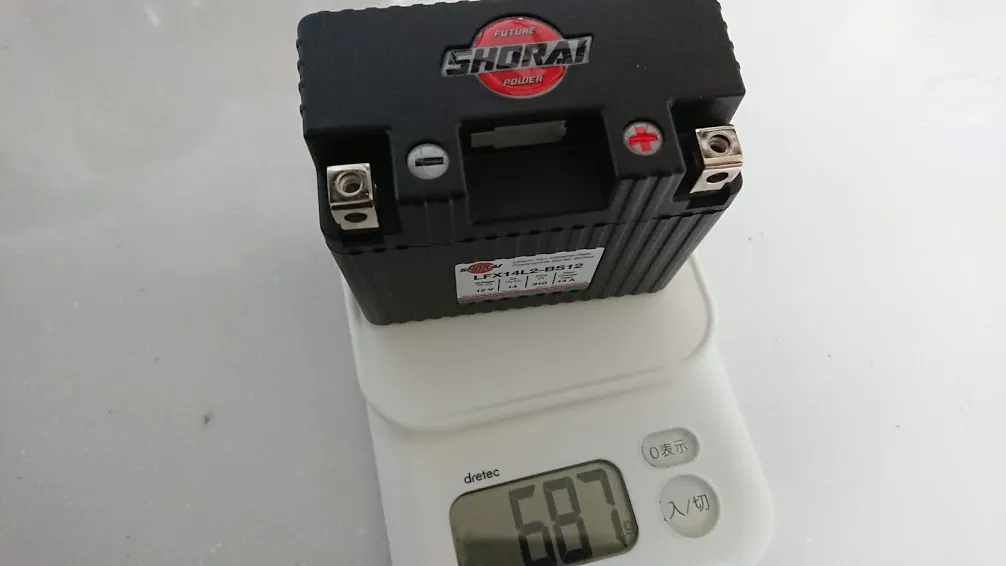
キッチンのはかりで計測したら687g。
Measured on the kitchen scale, it was 687g.
350mlの缶ビール2つ分よりも軽い。
It’s lighter than two 350ml cans of beer.
実際、手に持ってみるとモックアップというか、中身の入っていない見本のような雰囲気すらある。
When you actually hold it, it feels like a mockup or a sample with no contents.
問題は、これでエンジンに火が入るのかどうか。
The question is whether this will start the engine.
じゃなければ売ってないわけだが、空のケースみたいな軽さが信じられない。
Otherwise, it wouldn’t be sold, but the lightness like an empty case is unbelievable.
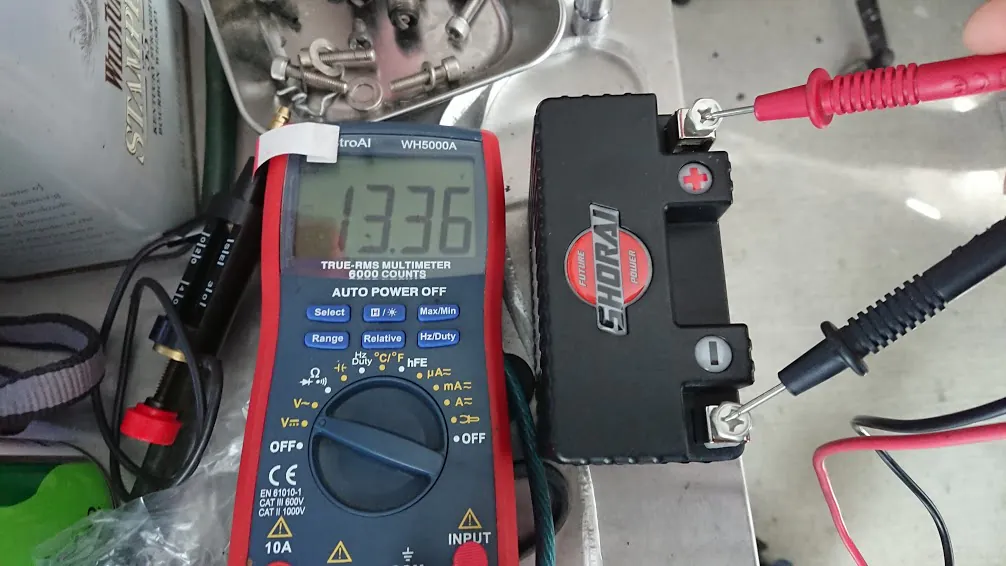
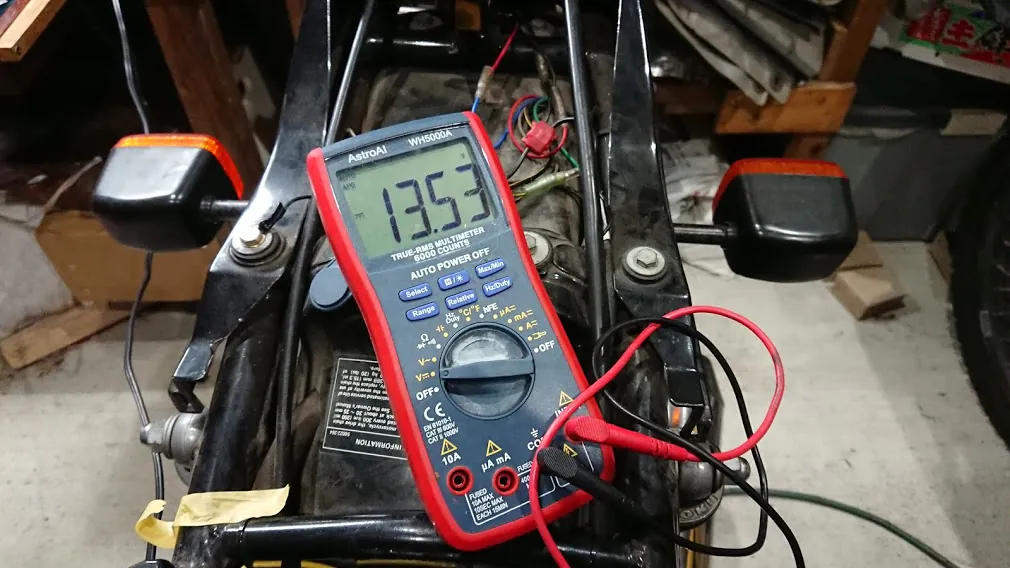
開封したての電圧は13.36V。
The voltage right after opening was 13.36V.
なかなか元気いっぱい。
Quite lively.
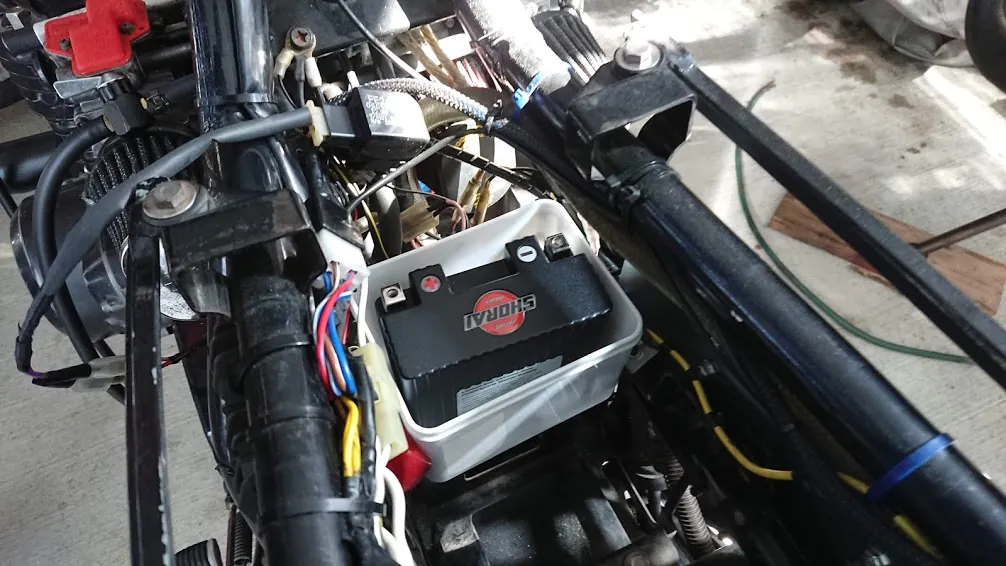
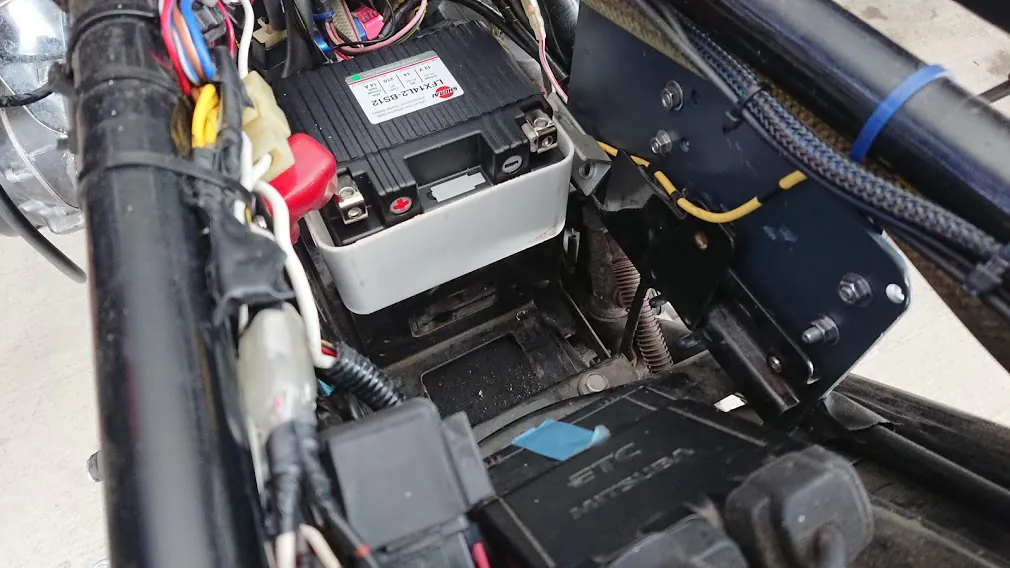
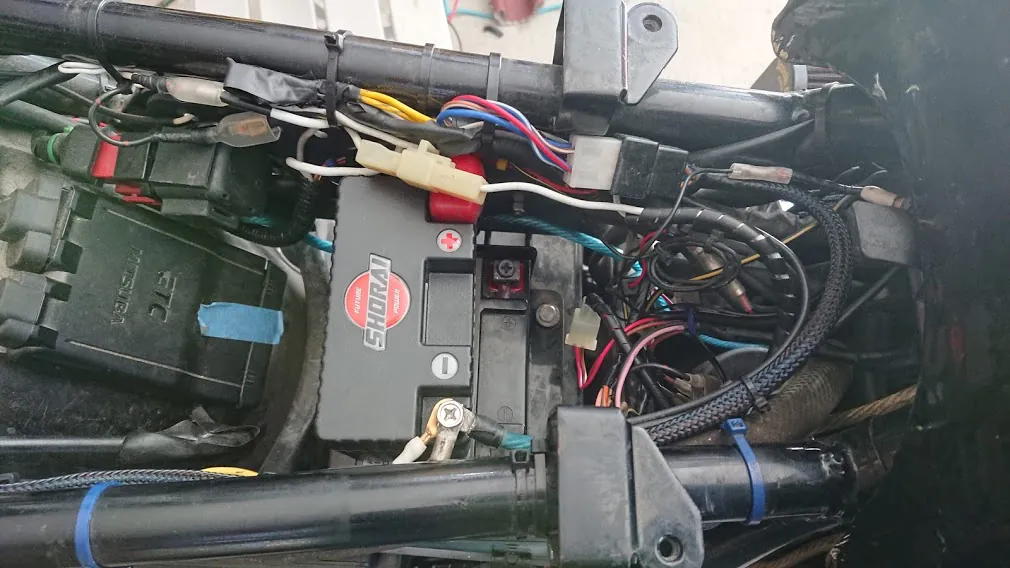
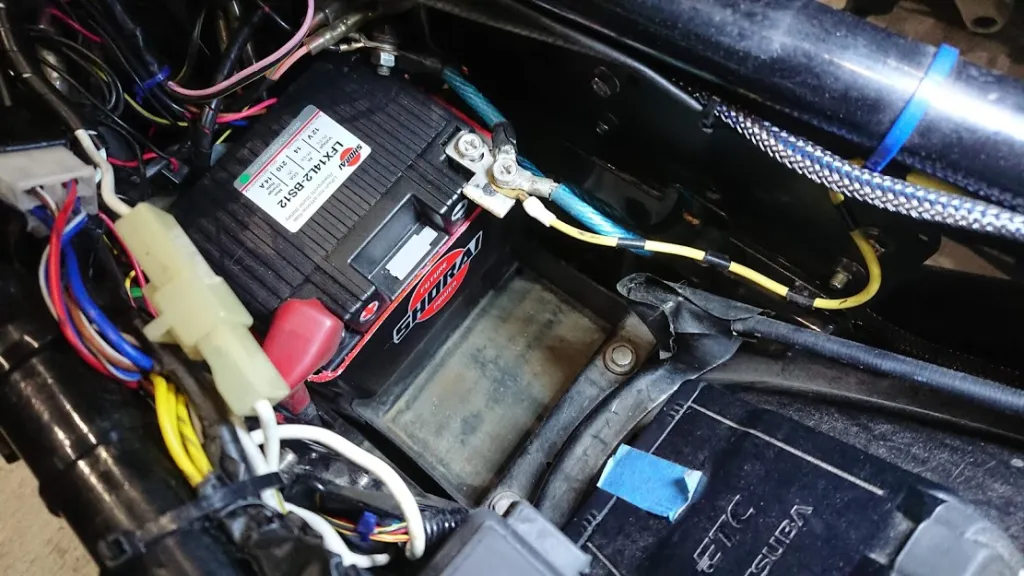
これを接続するわけだが、何しろサイズが小さいので、そのままだと底に沈んでターミナルが取り付けられない。
This needs to be connected, but since the size is small, it sinks to the bottom and the terminal can’t be attached as it is.
なので、ゲタを履かせて接続。
So, I used a spacer to connect it.
といっても、驚異的な軽さなので、ターミナルだけでぶら下がることが出来る…しないけど。
That said, it’s so light that it could hang just by the terminal… but I won’t do that.
で、おそるおそるIGオン…ちょっと咳き込んだけど、チョーク引いたら無事に点火!
Then, I nervously turned the IG on… it coughed a bit, but when I pulled the choke, it ignited successfully!
当初は13V台だったけど、どんどん電圧が上がって14V台をマーク。
Initially, it was in the 13V range, but the voltage kept rising and reached the 14V range.
ここまでくれば安心。
At this point, I felt relieved.
いったんバッテリーを取り出して、ケースづくりを考える。
I took out the battery once and thought about making a case.
これがバイク屋とかエンスーのブログだと「アルミでワンオフのケースを作成」とシレっと書くんだろうけど、コロナ禍で収入が激減した我が家ではムリ。
In a bike shop or an enthusiast’s blog, they would casually write, “Made a one-off case out of aluminum,” but that’s impossible for our household, where income has drastically decreased due to the pandemic.
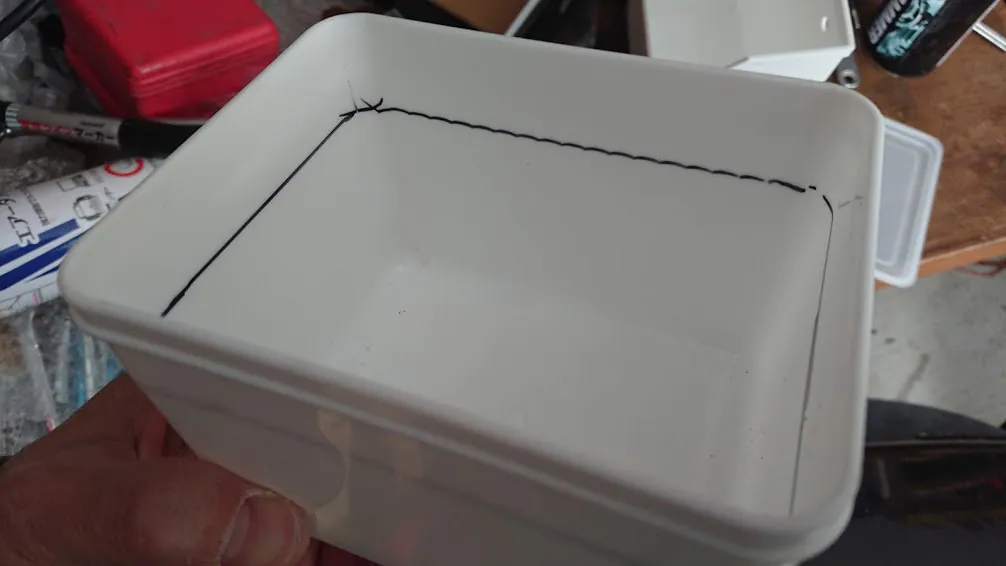
そういう時に足を運ぶのは100円ショップ。
In such times, I go to the 100 yen shop.
小銭と型紙もって(笑)。
With some change and a template (lol).
よさげなアイテムをいくつかチョイス。
I chose some promising items.
失敗しても100円なので、気兼ねなく買えるという(笑)。
Even if I fail, it’s only 100 yen, so I can buy without hesitation (lol).
バッテリーの収まり具合だけではなく、機体側との相性もチェック。
I checked not only how the battery fits but also its compatibility with the vehicle.
DT125Rでも大活躍「ワイドはしさし」は、寸法的にはジャストサイズ。
The “Wide Hashisashi,(Chopsticks case)” which is also very useful for the DT125R, is a perfect size dimensionally.
が、ハコの底に細かいスリットが入っているのでマウントに苦労しそう。
But the bottom of the box has fine slits, so it seems like it would be difficult to mount.
これも寸法的には悪くない。
This one isn’t bad dimensionally either.
余分なところは、スパっと斬ればいいだけなので。
You can just cut off the extra parts.
これ、何かイメージに近いかも。
This one might be close to my image.
というわけで、厳正なる審査の結果、優勝は『ハンドル付 シール容器』に決定!
So, after rigorous examination, the winner is the “Sealed Container with Handle!”
商品名でセールスポイントのひとつでもあるハンドルは、残念ながら不要なので撤去。
Unfortunately, the handle, which is one of its selling points, is unnecessary, so I removed it.
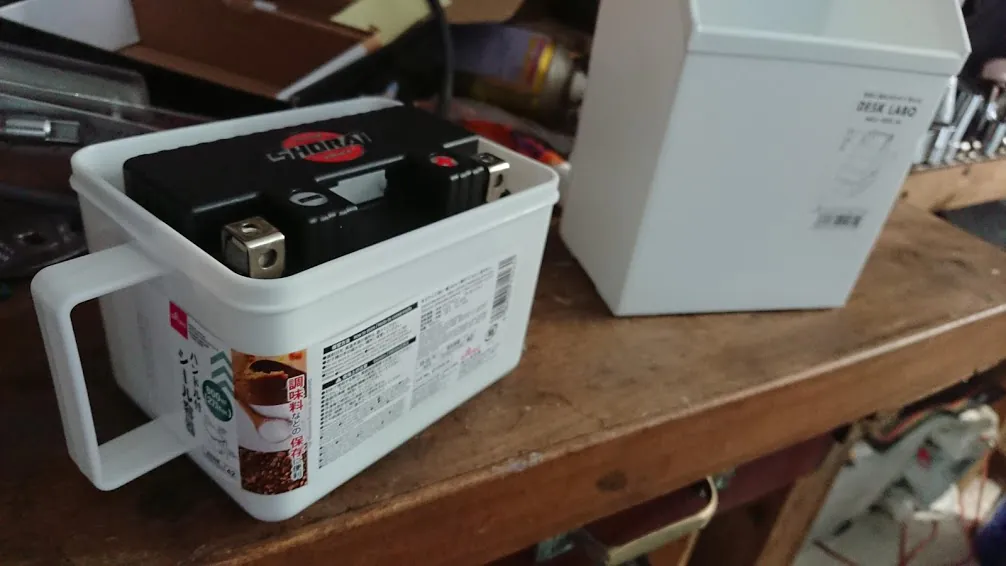
とりあえず、フィッティング。
For now, fitting.
縦置きは、もちろんのこと…
Vertical placement, of course…
横倒しにしてもOKみたいね。
It seems to be okay even if placed horizontally.
「もっとジャストサイズの方がいいんじゃないの?」と言われそうだけど、ピッタリ過ぎてもよろしくないらしい。
You might say, “Wouldn’t a more exact fit be better?” but it seems that being too snug isn’t good either.
振動が伝わると、バッテリー内部の配線か何かがアジャパーになるんだそうで。
If vibrations are transmitted, something like the internal wiring of the battery can get messed up.
なるほど、それでパッケージには「これでもか」というくらい緩衝材がついてくるのね。
I see, that’s why the package comes with so much cushioning material.
何となく方向性が定まったところで、いよいよケースを加工。
With the direction somewhat decided, I finally started processing the case.
まずは箱の高さを低くしてやる。
First, I lowered the height of the box.
こうすることで、ケースからバッテリーを取り出しやすくできる。
This makes it easier to take the battery out of the case.
次に、ボルト穴のピッチに合わせて穴を開けてやる。
Next, I drilled holes to match the bolt pitch.
100円ショップの商品を選んでいるのは価格もあるけど、加工のしやすさ。
The reason for choosing 100 yen shop products is not just the price, but also ease of processing.
ドリルなどの電工がなくても、小中学生が図工で使うような道具でも作業できる。
Even without power tools like drills, you can work with tools used by elementary and junior high school students in craft class.
下からの振動に備えて分厚い緩衝材を底に敷く。
I laid thick cushioning material at the bottom to guard against vibrations from below.
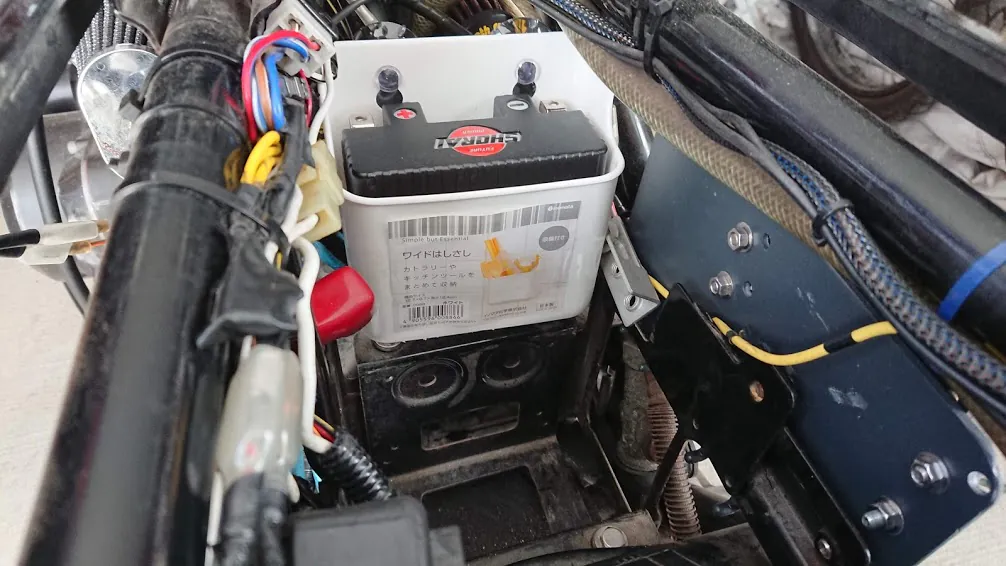
だいたいこんな感じで収まる。
It fits pretty much like this.
ケースを置くのは、純正バッテリーケースをマウントするボルトの辺り。
The case is placed around the bolts that mount the original battery case.
ここで共締めしてやる。
I fasten it together here.
さすがに白のままだと浮き過ぎるので、色は周囲に合わせてやる。
White stands out too much, so I matched the color with the surroundings.
昨年のステイホーム時期、模型製作用に買ってきた水性塗料。
The water-based paint I bought last year during the stay-at-home period for model making.
屋根裏に放置していたけど、ぜんぜん劣化していない。
I left it in the attic, but it hasn’t deteriorated at all.
こいつを筆でペタペタ塗っていく。
I painted it with a brush.
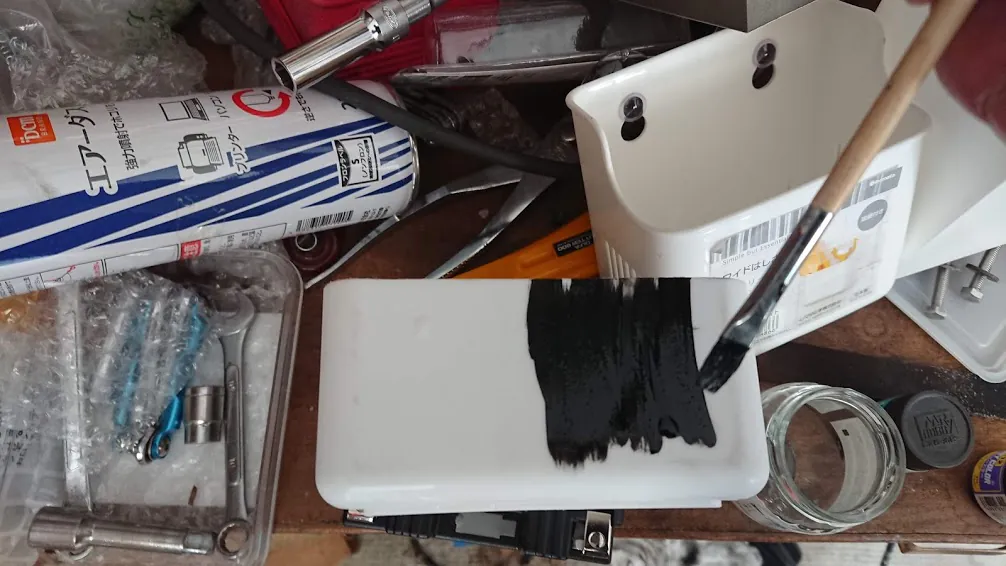
筆で塗るとムラが…なんてことは気にしない。
I don’t worry about brush marks…
お金と手間をかけるところは、そこじゃない。
That’s not where to spend money and effort.
黒で試し塗りして、ガンメタ重ね塗りしたら、ハイこの通り。
After a test coat of black and a layer of gunmetal, here it is.
ただしラッカー塗料と違って食いつきは悪いので、曲げたりこすったりするとペリペリと剥がれてくる恐れあり。
However, unlike lacquer paint, it doesn’t adhere well, so bending or rubbing may peel it off.
何処かのタイミングで黒いスプレー缶を買ったら、ついでに塗りなおしたらいいでしょう。
At some point, when you buy a black spray can, you should repaint it then.
リチウムバッテリーの特性上、立てても寝かせても設置できるのでターミナルのボルト穴は2方向に向いている。
Due to the characteristics of the lithium battery, it can be installed vertically or horizontally, so the terminal bolt holes face in two directions.
あとはターミナルに結線すればエンジンに火が入る…はずが、作業を進めて再度エンジンに火を入れようとしても、セルモーターは回るけど火が入らない。
All that’s left is to connect the terminals and start the engine… but even after progressing with the work and trying to start the engine again, the starter motor turns, but it won’t ignite.
そもそも混合気がエンジンに送り込まれているのだろうか。
Is the mixture even being fed into the engine?
クランキングの間、キャブを後ろから覗き込んでみたが、吹き返しの霧も見えない。
While cranking, I peeked into the carb from behind but didn’t see any mist blowing back.
どうやらサブタンクの使い方が悪かったみたい。
It seems I was using the sub-tank poorly.
コポコポと燃料がフロートに吸い込まれていくのを確認して、再度トライするもダメ。
I confirmed the fuel being sucked into the float with a gurgling sound and tried again, but no luck.
だんだんバッテリーがヘタってきた気がしたので、いったん充電。
I felt the battery gradually weakening, so I charged it once.
「普通の充電器で大丈夫なの?」というツッコミが入りそうだけど。
You might ask, “Is a regular charger okay?”
YouTubeでもリチウムイオン電池は専用充電器じゃないとダメだとか、14V以上の電圧をかけちゃいけないとか言ってる人もいて、何万回も再生されているけど…
On YouTube, some people say that lithium-ion batteries need a special charger and shouldn’t be charged with more than 14V, and these videos have been played thousands of times, but…
じゃあ、バイクに積めないじゃん(笑)。
Then you can’t use it on a bike (lol).
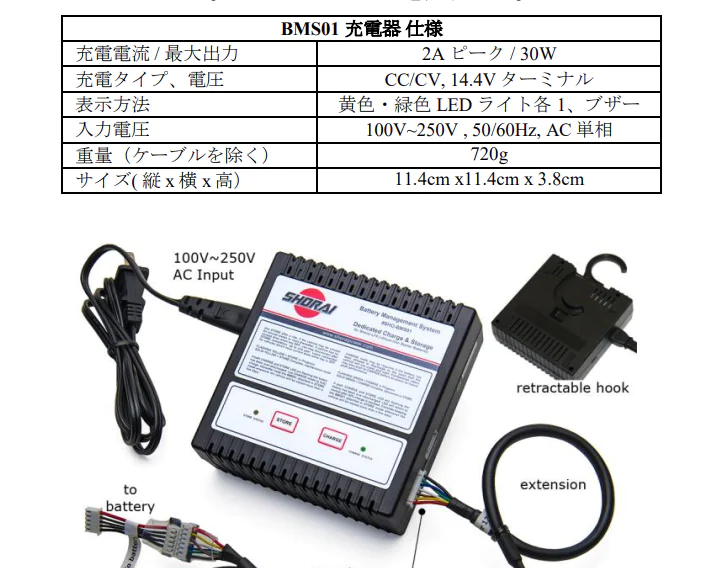
そもそもSHORAIバッテリーの充電器のスペックを見るとご覧の通り。
In the first place, looking at the specs of the SHORAI battery charger…
充電タイプ、というところを見ると、CC/CVで14.4Vで充電すると書いてます。
Looking at the charging type, it says to charge at 14.4V with CC/CV.
CCというのは、Constant Currentの略で、日本語でいう定電流充電。
CC stands for Constant Current, which means constant current charging in Japanese.
バッテリーに一定の電流を供給する充電方法。
It’s a charging method that supplies a constant current to the battery.
バッテリーが低い電圧のときに使用され、充電が進むにつれてバッテリーの電圧が上昇。
It’s used when the battery voltage is low, and as charging progresses, the battery voltage rises.
CV(Constant Voltage)は定電圧充電。
CV (Constant Voltage) means constant voltage charging.
バッテリーに一定の電圧を供給する充電方法。
It’s a charging method that supplies a constant voltage to the battery.
バッテリーの電圧が上昇し、所定の電圧に達した後はその電圧を維持しながら充電する。
After the battery voltage rises and reaches the specified voltage, it charges while maintaining that voltage.
この段階では、バッテリーの電流が徐々に減少する。
At this stage, the battery current gradually decreases.
MOSFET型レギュレーターレクチファイアも高速スイッチング回路で、電圧を細やかにコントロールするように設計されている。
MOSFET-type regulator rectifiers are also designed to control voltage finely with high-speed switching circuits.
だから、ストックのレギュレーターとは組み合わせられないんだけどね。
So, they can’t be combined with stock regulators.
気を取り直してMFバッテリーで起動実験。
I tried to start it again with the MF battery.
問題なく火が入り、アイドリングで14.5Vをマーク。
It ignited without any problems, marking 14.5V at idle.
次にリチウム・フェライトバッテリーを繋いで起動。
Next, I connected the lithium-ferrite battery and started it.
こちらも、どうにか火が入ったが14Vには満たない。
This one also ignited somehow but didn’t reach 14V.
レギュレーターのコネクターを外し、ダイナモからの交流電圧を測定。
I removed the regulator connector and measured the AC voltage from the dynamo.
住宅地では4000RPMまで回し続けることは出来なかったが、一瞬でも40Vまで届けばOKという条件では大丈夫だった。
In the residential area, I couldn’t keep it at 4000 RPM, but it was okay with the condition that it reached 40V even for a moment.
MOSFETレギュレーターからバッテリーへの返しは14V以上。
The feedback from the MOSFET regulator to the battery was over 14V.
電気に詳しい諸兄はご存知の通り、電圧が高ければ良いというものではない。
As those knowledgeable about electricity know, higher voltage isn’t always better.
壊れたレギュレーターは、ダイナモからの供給量に比例して電圧が上昇し続けるが、正常な場合は一定の電圧で「高止まり」する。
A broken regulator will continue to increase voltage in proportion to the supply from the dynamo, but in normal cases, it will “plateau” at a constant voltage.
しばらく使っているMOSFETレギュレーターだが、14.50Vで安定。
The MOSFET regulator I’ve been using stabilizes at 14.50V.
これで、充電性能に異常はない、と判断できる。
This confirms that there is no abnormality in the charging performance.
ということは、リチウム・フェライトバッテリーに問題があるのだろうか。
So, is there a problem with the lithium-ferrite battery?
数分間、アイドリングさせてみたところ、電圧が落ちて点火しなくなるような症状はない。
After idling for a few minutes, there were no symptoms of the voltage dropping and failing to ignite.
思い切って路上テストをしたいところだが、自宅から遠く離れたところで不動となったら目も当てられない。
I’d like to boldly test it on the road, but if it stops far from home, it would be a disaster.
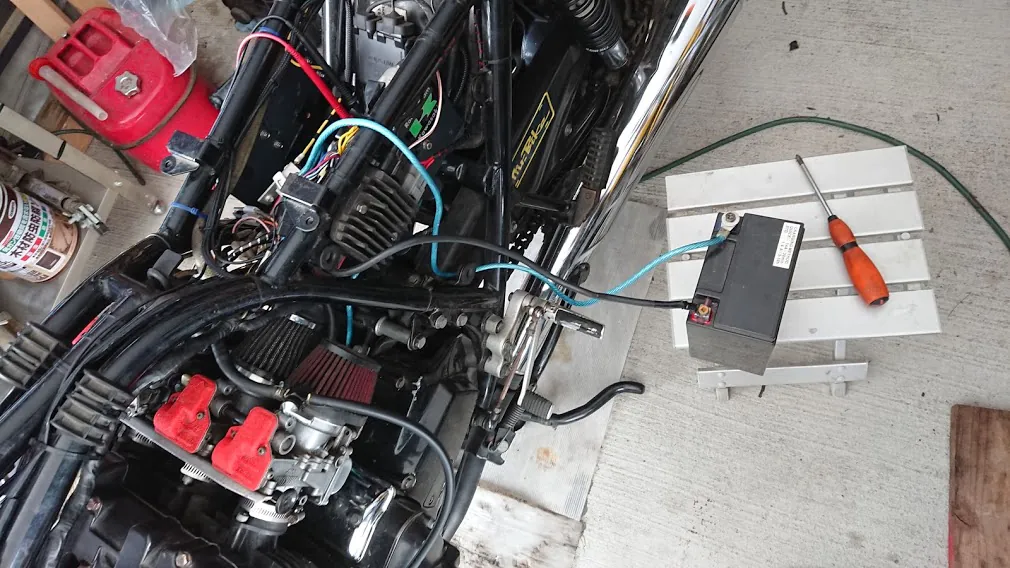
いろいろと考えた挙句、出した回答がコレ。
After thinking about it a lot, this is the answer I came up with.
何のことか良く分からない?
Don’t know what this is about?
角度を変えてみると、この通り。
If you change the angle, here it is.
天才じゃないだろうか、と自画自賛の予備バッテリー搭載仕様(笑)。
Self-praising as a genius for this backup battery setup (lol).
これなら、+ドライバーさえ持っていれば、リチウムバッテリーがダメになっても帰還できる。
With this, as long as you have a + screwdriver, you can return even if the lithium battery fails.
気持ちが大きくなったところで、路上テスト開始。
Feeling emboldened, I started the road test.
やはり、どんなに回しても14Vには到達しない。
Still, no matter how much I revved, it didn’t reach 14V.
何処かに不具合があるのか、それとも仕様が間違っているのか…10分ほど走った頃、13.8Vそこそこで止まっていた電圧が上昇。
Is there a defect somewhere, or is the specification wrong? After running for about 10 minutes, the voltage, which had stopped at around 13.8V, increased.
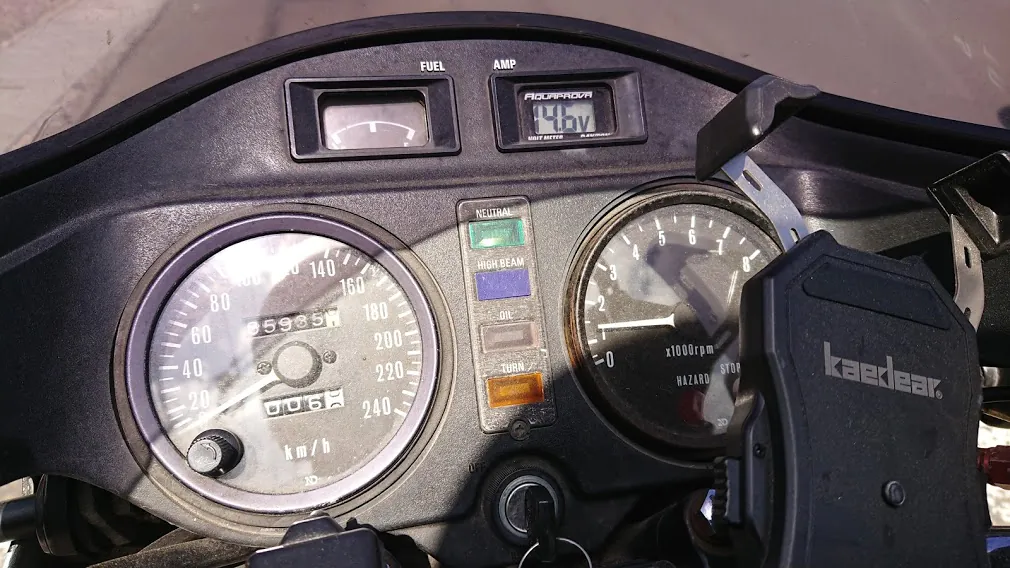
ヘッドライトOFFで14.6V。
14.6V with the headlight off.
ヘッドライトONで14.0V、3000RPMで走ればMAX14.8Vまで上昇した。
14.0V with the headlight on, and it rose to a max of 14.8V at 3000 RPM.
ちなみにユーザーマニュアルによれば「14.8Vを超える電圧で充電するべからず」と書いてある。
By the way, according to the user manual, it says, “Do not charge with a voltage exceeding 14.8V.”
20kmほど走行してみたが、問題はなさそうだった。
I drove about 20km, and there didn’t seem to be any issues.
翌日、もう少しシビアなコンディション…スポーツ走行や渋滞、ノロノロ運転などが重なる道を走りまくる。
The next day, I drove under slightly more severe conditions… sports driving, traffic jams, and slow driving on combined roads.
今度は50km以上走ったが、電圧降下などの症状もなかったのでMFバッテリーを撤去。
This time, I drove over 50km, and there were no symptoms of voltage drop, so I removed the MF battery.
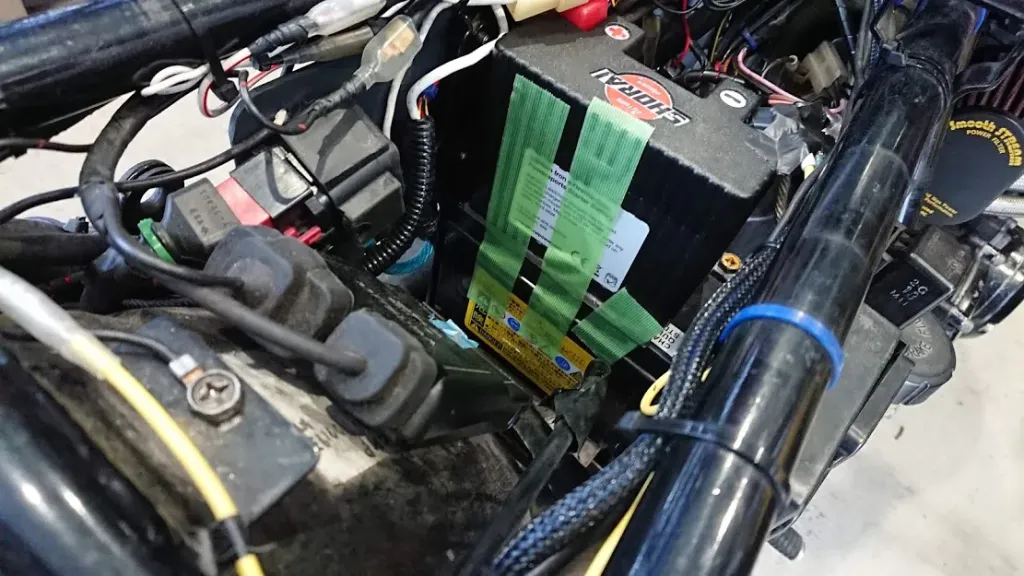
付属のステッカーを貼って、縁取りを赤く塗って専用品っぽくする(見えないけど)。
I put on the included stickers and painted the edges red to make it look like a dedicated product (though you can’t see it).
ご覧の通り、バッテリーケースがすっからかんになったので、弁当箱でも何でも入るようになった。
As you can see, the battery case is now empty, so you can put in a lunch box or anything.
実際は工具とかパンク修理キットを収納したらいいと思う。
Actually, it’s better to store tools or a puncture repair kit.
何だかんだ言って20日以上かかってしまった…
All in all, it took more than 20 days…
それから実験というか体験するのは半年後だと思うが、リチウムバッテリーは気温によって始動性が低下するのだそうだ。
I think the next experiment or experience will be in half a year, but it seems that the starting performance of the lithium battery decreases with temperature.
巷では「儀式」と呼ばれているが、その辺をちゃんと書いていないブログが多いので、マニュアルに書いてあることを転載しておく(日本語訳がちょっとイケてないので、意訳します)。
It’s commonly called a “ritual,” but since many blogs don’t properly describe it, I’ll repost what’s written in the manual (since the Japanese translation isn’t great, I’ll paraphrase).
『摂氏7度までなら、通常通りにエンジンが始動できる。
‘The engine can start normally up to 7 degrees Celsius.
気温が低い場合、始動前にヘッドライトを点灯させ、バッテリーを活性化させてからエンジンをかけること。摂氏5度くらいならヘッドライト点灯後、30秒間ほど待ってからエンジンをかける。
If the temperature is low, turn on the headlights before starting to activate the battery, then start the engine. If it’s around 5 degrees Celsius, wait about 30 seconds after turning on the headlights before starting the engine.
摂氏-17度(北海道レベル)の場合はヘッドライトを4~5分点灯したままにしておき、そこからエンジンをかける。
If it’s -17 degrees Celsius (Hokkaido level), leave the headlights on for 4-5 minutes before starting the engine.
ヘッドライトに限らず、ほかの電装系(USB電源やグリップヒーターなど)でも代用可能』
It doesn’t have to be the headlights; other electrical systems (USB power, grip heaters, etc.) can also be used.’
氷点下だと始動性云々ではなく、路面が走れる状態にあるのか?という話にもなってくるのだが、オフ車で雪山遊びする
人達は覚えておく必要があるだろう。
In sub-zero temperatures, it’s not about starting performance but whether the road is drivable. People who play in snowy mountains with off-road vehicles should remember this.
2024年5月 追記 May 2024 Update
ちなみにSHORAI バッテリーをはじめリチウムイオン電池を補充電、再充電する場合は専用の充電器が必要。
By the way, when recharging or recharging lithium-ion batteries, including SHORAI batteries, a special charger is required.
というのも、リチウムイオン電池は充電コントロールがシビアというかデリケート。
That’s because lithium-ion batteries are sensitive or delicate in charging control.
鉛バッテリーと同じように、複数の電池で構成されているが、各電池(セル)の電圧が平均化するように制御して充電する。
Like lead-acid batteries, they are made up of multiple cells, but they are controlled to charge so that the voltage of each cell is averaged.
そうしないとバッテリーの性能低下などにつながるらしい。
Otherwise, it seems to lead to battery performance degradation.
なるほど、とも思う。
I understand.
高価なバッテリーだから大事に使いたいものね。
It’s an expensive battery, so you want to use it carefully.
しかし、ですよ。
However.
普段、車体に積んで使う時、バッテリーに電気を供給するのはレギュレーターレクチファイアでしょ。
Usually, when using it on the vehicle, the regulator rectifier supplies electricity to the battery.
単なるプラスとマイナスをつなぐだけ。
It just connects the positive and negative.
たいていがMOSFET型レギュレーターレクチファイアと併用しているとはいえ、充電器より荒削りな電気がバッテリーに流れ込むだろうし、そんなのでぶっ壊れてしまうようなバッテリーは実用性ゼロだろう。
Even though it is usually used with a MOSFET-type regulator rectifier, rougher electricity than a charger will flow into the battery, and a battery that breaks from that would have zero practicality.
もしかしたら、定期的に「整え充電」した方が寿命が伸びるのかもしれない。
Maybe regular “maintenance charging” extends its lifespan.
自分のSHORAIバッテリーに関していえば3年使ってみたけど、現在のところ目立ったトラブルなし。
As for my SHORAI battery, I’ve used it for 3 years with no noticeable trouble so far.
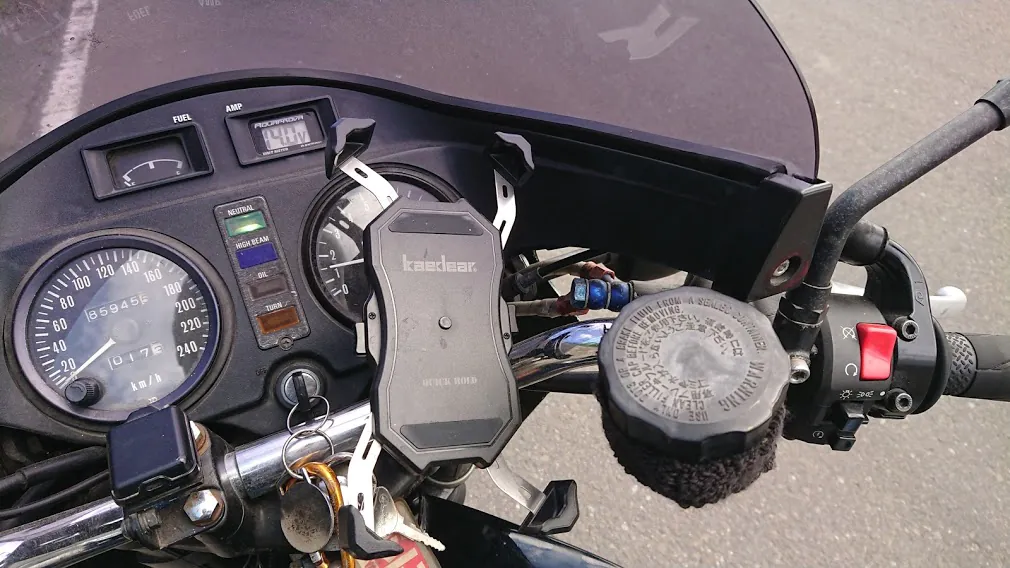
この記事に映っているメーターパネルの写真を見ると85935kmで、現在は97233km。
Looking at the photo of the meter panel in this article, it’s at 85,935km, and now it’s at 97,233km.
1万キロ以上走って3回の冬を越している。
It’s run over 10,000km and survived three winters.
さすがにトリクル充電は繋いでないけど、普通のありきたりの充電器で補充電をしたことも1回か2回ある。
I haven’t connected a trickle charger, but I’ve topped it off with a regular charger once or twice.
それでも丈夫に動いているので、実はそんなにシビアになる必要はないんじゃないかと…
Even so, it’s running strong, so maybe there’s no need to be so strict…
そういうことを言うと怒られそうだけど(笑)。
I might get scolded for saying that (lol).
コメント