先日OHしたリアブレーキ。
Recently, I overhauled the rear brake.
しかし、マスターシリンダー内部のピストンが劣化しており、少しずつブレーキフルードが漏れてくる。
However, the piston inside the master cylinder has deteriorated, causing brake fluid to leak gradually.
エンジンオイルの滲みなら「継ぎ足し」で乗り切ることも出来るけど、さすがにブレーキフルードはよろしくない。
While engine oil seepage can be managed with topping off, leaking brake fluid is not acceptable.
塗装面を傷めるだけじゃなくて、制動装置に不具合がある、というのは大問題。
Not only does it damage the paint, but a malfunctioning brake system is a major issue.
バイクや自動車などは「停まってナンボ」です。
For motorcycles and cars, the ability to stop is critical.
じゃあ、何を使えばいいのか。
So, what should I use?
すでにZ1R純正ピストンは廃盤。
The original Z1R pistons are discontinued.
取り付けピッチが合えば、何でもよいでしょう、ということで現行車両の中からチョイス。
As long as the mounting pitch fits, anything should be fine, so I chose from current models.
某ショップではNINJA250 (43015-0091)を推奨しているようだけど、難点がふたつ。
A certain shop recommends the NINJA250 (43015-0091), but there are two issues.
ひとつは、ロッドが短いため途中に高ナット(長ナット)などでロッドの長さを調整しなければならない。
First, the rod is short, so it needs to be adjusted with high nuts (long nuts) or similar.
やり方自体は単純なのだけど、ドンピシャのサイズで部材を調達するノウハウがない。
The method itself is simple, but I lack the know-how to procure the exact size materials.
こういうことをサラリとやってのけるのが、ショップの技術でありノウハウである。
Doing this smoothly is where the shop’s skill and know-how come in.
もうひとつは、NINJA250のパーツはヤフオク中古品でも、そこそこ高い。
The other issue is that even used NINJA250 parts on Yahoo! Auctions are quite expensive.
5000円以上の値がついているのを見て諦めました。
I gave up after seeing prices above 5000 yen.
新品だとASSYで15000円以下で買えるのだが、正直、そんなに出したくない(笑)。
New, it can be bought as an assembly for less than 15000 yen, but honestly, I don’t want to spend that much (lol).
「いや、そこは買えよ」と言われそうだけど。
You might say, “Just buy it.”
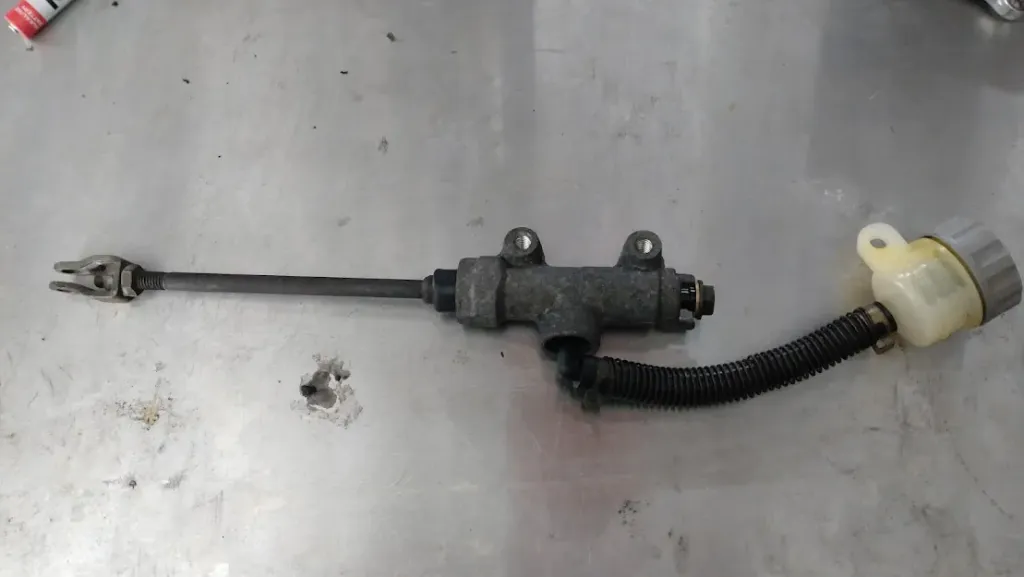
NINJA250のマスターシリンダー。バックステップと取付位置の兼ね合いで、ロッドがかなり短い
NINJA250’s master cylinder. The rod is quite short due to the balance with the backstep and mounting position.
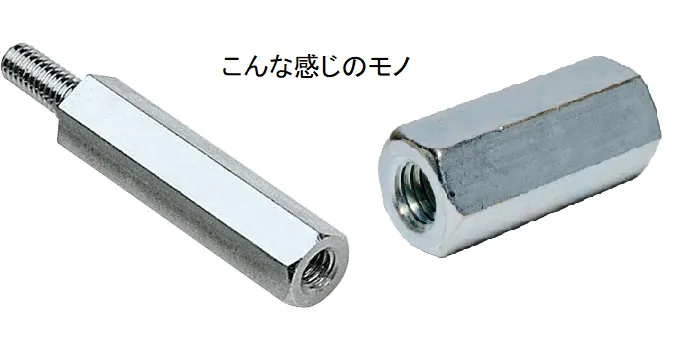
NINJA250などSSのマスターシリンダーを使用する際は、こういうので延長してやる
When using a master cylinder from a NINJA250 or other SS, extend it like this.
某SNSでどうしよう、困ったな、と言ってたらフォロワーさんが
When I mentioned my dilemma on a certain SNS, a follower said,
「エストレヤがいいですよ、ヤフオクでも安いですし」
“Estrella is good, and it’s cheap on Yahoo! Auctions too,”
と作例画像と共にアイディアをDMを送って下さった方が…!
and sent me the idea with example images via DM…!
ご自身の愛機で搭載済みなので、非常に心強い。
Since he had it installed on his own machine, it was very reassuring.
2000年辺りは、まだSNSもなくて、ホームページには掲示板(BBS)が併設されてて、割とそこでの交流が多かったんだけど、いまはそういうのもなくなりましたからね。
Around 2000, there were no SNS yet, and websites had bulletin boards (BBS) attached, where there was a lot of interaction, but now that’s all gone.
ブログのコメント欄を利用して書き込んでくれる方々もいますけど、多分、相当めんどうくさいとか、ストレスを感じながら書いてくれてるのだろうな、と思います。
Some people write in the blog’s comment section, but I think they probably find it quite troublesome and stressful.
いまや、どれくらいの「読者」がいるのか分かりませんが、統計的には最低でも1日100PVはあるようなので、もうお気軽に感想でも、一日の愚痴でも、相談事でも何でも書いて下さい(笑)。
I don’t know how many “readers” there are now, but statistically, there seem to be at least 100 page views a day, so feel free to write anything, whether it’s feedback, daily gripes, or consultation (lol).
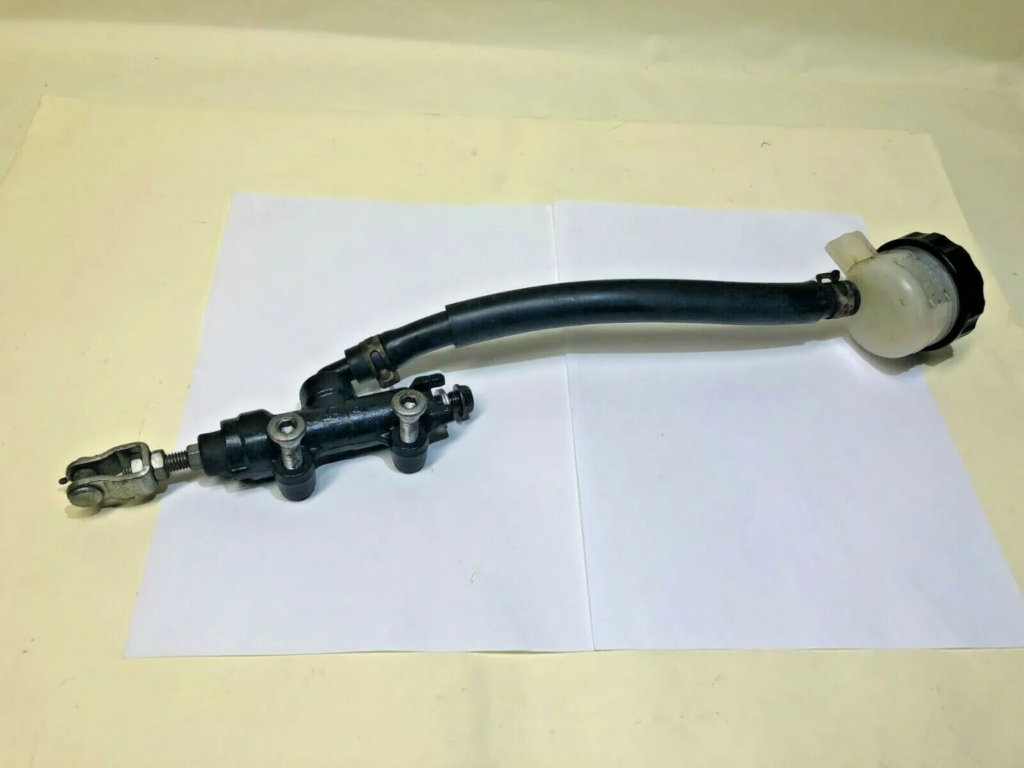
というわけで、久しぶりのヤフオクで購入したエストレヤのリアマスター一式。
So, I purchased a complete rear master set for Estrella on Yahoo! Auctions for the first time in a while.
1,500円くらいで、誰も入札が無く平和に落札。
I won it peacefully for about 1,500 yen with no other bids.
エストレヤの利点はロッドの長さ。
The advantage of Estrella is the rod length.
Zとポジションが似ているので、こういう長さになるんでしょう。
Since the position is similar to the Z, it has this kind of length.
いい感じでシオシオになっているけど気にしません。
It’s nicely weathered, but I don’t mind.
無塗装のマスターシリンダーなんて、多かれ少なかれこんなもの。
An unpainted master cylinder is like this to some extent.
ようは、漏れてこなければOK。
The point is, as long as it doesn’t leak, it’s OK.
とりあえず、OHを兼ねて分解。
For now, I disassembled it for an overhaul.
Z1Rはリテーナーだけど、エストレヤなど1/2サイズのマスターシリンダーはCリングというかスナップリングなので、分解するにはスナップリングプライヤーが要ります。
The Z1R uses a retainer, but the Estrella and other 1/2 size master cylinders use a C-ring or snap ring, so snap ring pliers are needed for disassembly.
先端形状に種類があるけど、パーツによってはプライヤーの先端が曲がっていないと(もしくは真っ直ぐじゃないと)スナップリングにアクセスできない場合があるので、そこはよく確認を。
There are different types of tip shapes, but depending on the parts, if the tips of the pliers are not bent (or straight), they may not be able to access the snap ring, so check that carefully.
実際、持っていたスナップリングプライヤー、うまいこと穴に届かなくて外すのに四苦八苦。
The snap ring pliers I had didn’t reach the hole properly, making it very difficult to remove.
何とかバラして内部を確認。
I managed to disassemble it and check the inside.
シールがダメになると、フルードのカスみたいなのがこびりつくのだが、そんな様子はなさそう。
If the seal fails, residue like fluid scum sticks, but there was no such sign.
見た目のシオシオさ加減とは裏腹に、モノ自体は大丈夫だったみたい。
Contrary to its weathered appearance, the item itself seemed fine.
早速、ロッドの加工に移る。
I immediately moved on to processing the rod.
Z1R純正ロッドよりもやや長いだけでは
なく、調整用のネジ山が短いのでコレを足してやらないといけない。
It’s slightly longer than the Z1R’s original rod, and the adjustment thread is short, so I need to extend this.
ネジ山を足す…?
Extend the thread…?
つくるってこと?
Create it?
そう、ロッドの表面を切削して、あらたにネジ山を刻んでやるのです。
Yes, by cutting the surface of the rod and creating a new thread.
そこで必要になるのが、タップ・ダイスセット。
This requires a tap and die set.
傷んだネジ山を修復したり、あらたにネジ山をつくるための工具。
It’s a tool to repair damaged threads or create new ones.
DIY整備を楽しんでいる人たちでも、実際に使ったことのある人は少ないんじゃないだろうか?
Even among those who enjoy DIY maintenance, few people have actually used it.
自分もそのひとり。
I’m one of those people.
どこかで調達してこないとイカン、と悩んでいたら…あるところには、あるものです。
I was worried about having to procure it from somewhere, but where there’s a will, there’s a way.
MAC TOOL(マックツール)のタップ・ダイスセット!
MAC TOOL’s tap and die set!
超高級品(笑)。
Super high-end (lol).
どういうわけか、新品未使用品が我が家にやってきた…!
Somehow, a brand new, unused set came to my house…!
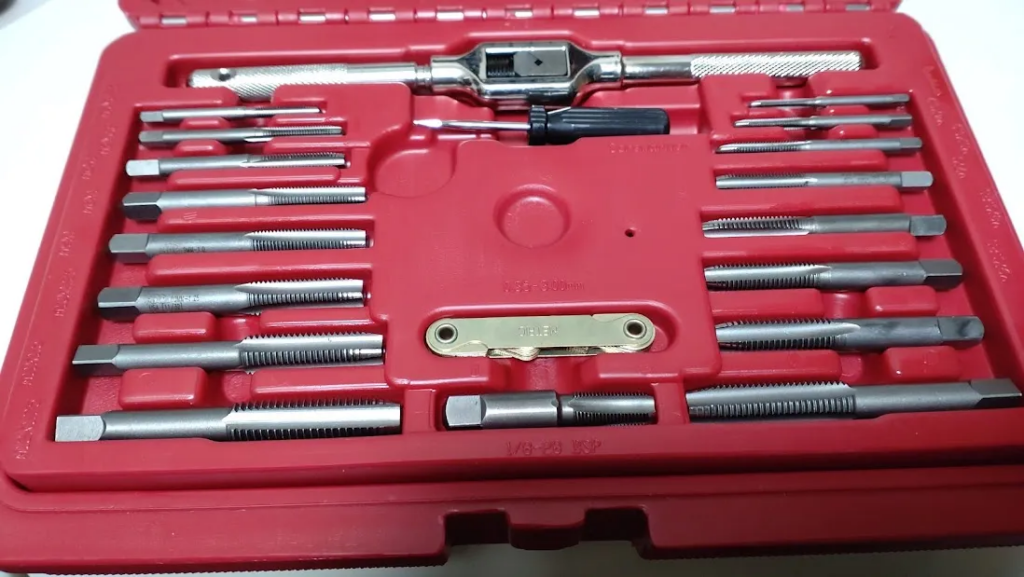
こっちが、タップ。
This is the tap.
新しくネジ穴を切ったり、ちょっとナメてしまったネジ穴やナットを復活させるのに使う。
It’s used to cut new threads or restore slightly stripped threads and nuts.
斜めにネジやボルトを回してネジ山を壊したりするでしょう?
You might ruin the threads by screwing at an angle, right?
あの時、これがあれば復活するというわけです。
This would restore them in such cases.

こちらがダイス。
This is the die.
金属棒にネジ山を作り出す道具で、タップと対をなす存在。
It’s a tool to create threads on metal rods, working in tandem with the tap.
今回使うのは、こちらのダイス。
This time, I’ll use this die.
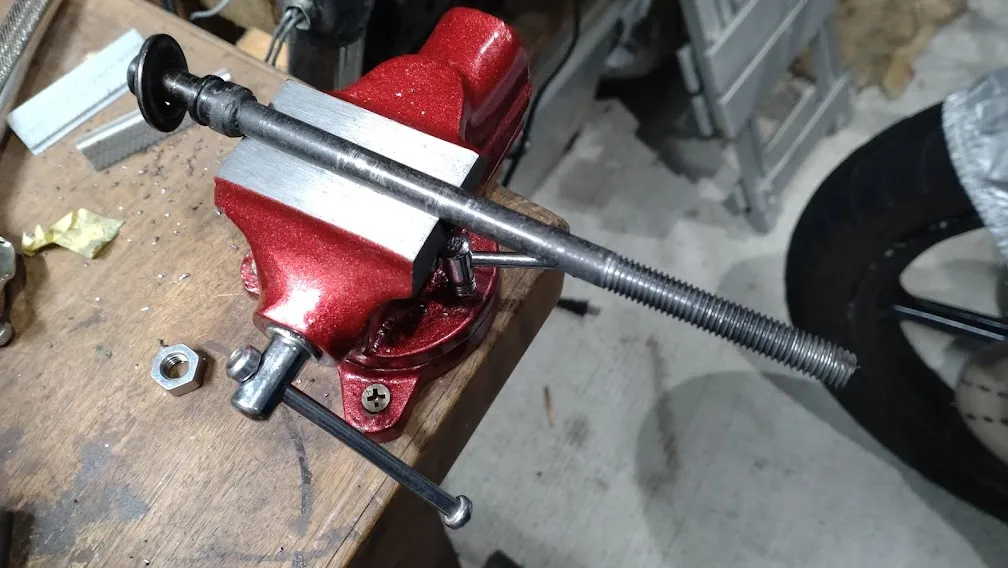
ネジ山を切るには、部材をしっかりと固定、ダイスが斜めにならないよう注意して回してやります。
To cut threads, secure the material firmly and turn the die carefully to avoid tilting.
最低でも万力(バイス)は要るでしょう…我が家のは、本当に最低ランクのひとつですが(笑)。
At the very least, you’ll need a vise… ours is truly one of the lowest ranks (lol).
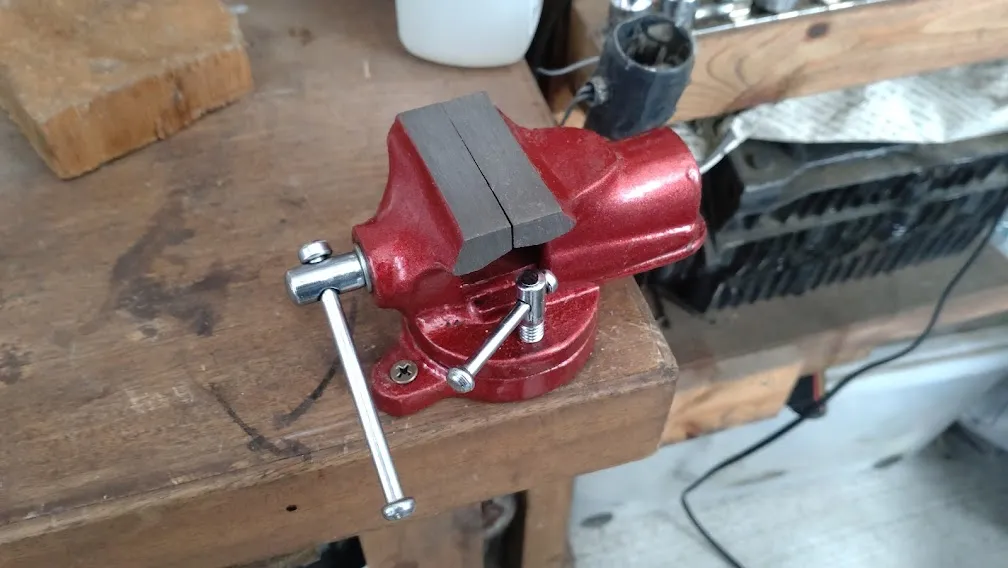
力をかける作業の時は、大きいのに越したことは無い。
When doing forceful work, bigger is better.
この万力は、手の平サイズなので、正直辛かったです。
This vise is palm-sized, so it was honestly tough.
そんなに巨大なヤツは要らないけど、できれば道具屋に行って、よさげなサイズを選んだ方がいい。
You don’t need such a giant one, but if possible, go to a tool shop and choose a suitable size.
最初はロッドの根元付近を挟み込んだり、ロッドを横にして挟んでみたりしたけど、ダイスを回そうとテンションをかけると、ちっとも固定できない。
At first, I tried clamping near the base of the rod or clamping the rod horizontally, but when I applied tension to turn the die, it didn’t stay fixed at all.
しょうがないので、凸のようになっているロッドの先端側を挟んで固定。
So I clamped and fixed the rod’s protruding end.


本来、上から下に切っていく山を下から上に…というのは、かなりイレギュラーなやり方。
Cutting threads from bottom to top instead of top to bottom is quite irregular.
しかし、バイスがうまいこと固定してくれないので、現状はこれが最適解。
However, since the vise doesn’t hold well, this is the best solution for now.
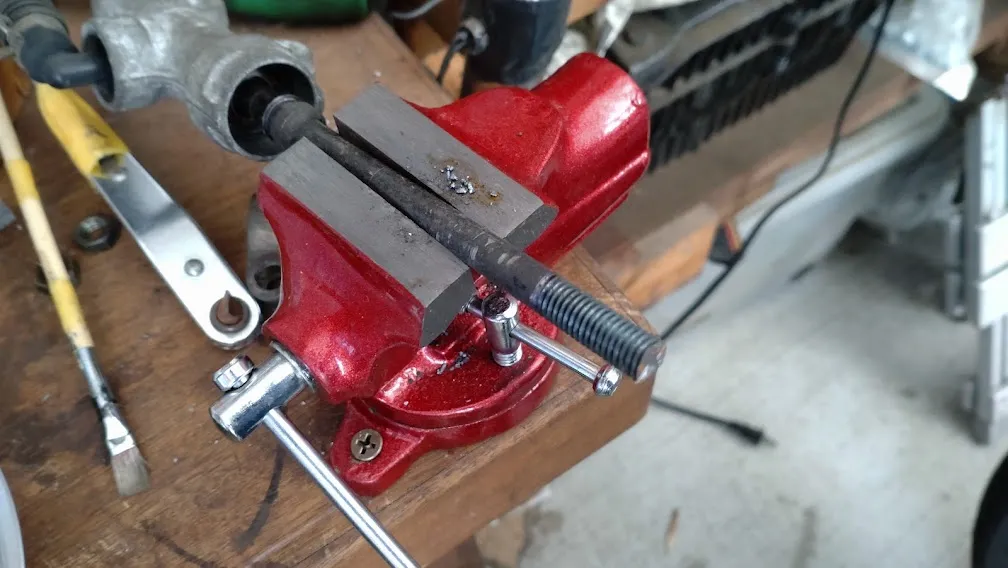
ダイスで新規にネジ山を切る時は、どんどん回してネジ山を切ってはいけない。
When cutting new threads with a die, don’t turn it continuously to cut the threads.
3/4回転くらい回したら、1/4回転戻す。
Turn it about 3/4 of a turn, then back off 1/4 turn.
これを繰り返してネジ山を作っていく。
Repeat this to create the threads.
不慣れなうえ、固定しているのがロッドの先端。
Being unfamiliar with it and clamping the rod’s end,
勢いよく回して、ポキっと折れたらシャレにならないので、1/4回転まで切ったら1/2回転戻して、を繰り返す。
if I turn it forcefully and it snaps, it wouldn’t be funny, so I turn it 1/4 turn and back off 1/2 turn, repeating this.
手応えに少しでも異変を感じたら、すぐに確認。
If I feel even a slight change in the feedback, I check immediately.
潤滑油を使いながら、ゆっくりとネジ山を形成していく。
While using lubricating oil, I slowly form the threads.
出来上がり。
Done.
ナットを通してみたが、途中で引っ掛かりはない。
I tried passing a nut through, and there was no catching.
さすがはMAC TOOL、一流工具を使うと下手くそでも、どうにか仕上がる。
As expected of MAC TOOL, even if you’re clumsy, you can manage to finish it with top-notch tools.
よくMAC TOOLにせよSnap Onを素人が使っても、宝の持ち腐れという人もいるが、逆です。
People often say that amateurs using MAC TOOL or Snap On is a waste, but it’s the opposite.
素人だからこそ、質の良い工具を使い、つたない技術を工具に補ってもらうのが正解。
It’s precisely because you’re an amateur that you should use quality tools to compensate for your lack of skill.
技術や経験を重ねていけば、ノーブランドの廉価品でもOKだったりするけど、基本は良い工具で。
With more skills and experience, non-branded cheap tools may be okay, but the basics should be with good tools.
次にロッド
の長さを調整。
Next, adjust the rod length.
つまり、切り落とす作業。
In other words, the cutting work.
写真を撮り忘れたけど、純正品と流用品を並べて、どこをカットするのか決める。
I forgot to take a photo, but I lined up the original and the replacement parts to decide where to cut.
何度か比べてみて「ここだ!」という位置にマスキングテープで目印をつける。
After comparing them several times, I marked the position with masking tape, saying, “Here it is!”
本当はベビサンなんかで一気に切り落としたいのだけど、あいにく電動工具がないので、金属用のノコギリで少しずつカットしていく。
I really wanted to cut it off all at once with a power saw, but unfortunately, I don’t have power tools, so I cut it little by little with a metal saw.
部材が鉄なので、そんなに頑張らなくても簡単に切れる。
Since the material is iron, it can be cut easily without much effort.
ここもまた、はやる気持ちを抑えて、ゆっくりと作業してやる。
Here too, I restrained my eagerness and worked slowly.
間違っても「もう折れるんじゃない?」と力をかけてはいけない。
Never apply force thinking, “It’ll break soon, right?”
曲がってしまったロッドを元に戻すのは、不可能に近いからだ。
It’s nearly impossible to straighten a bent rod.
こういう作業は、とにかく「急がば回れ」が基本です。
The basic principle in such work is “slow and steady wins the race.”
ちなみに、ネジ山を作った時、見よう見まねで焼き入れをしてみた。
By the way, when I made the threads, I tried hardening them by imitation.
トーチで熱したロッドを油で冷ましてやるといい、なんて教わったけど、本当はそんな簡単なものじゃないらしいけど…
I was told it’s good to heat the rod with a torch and then cool it with oil, but it seems it’s not that simple…
切削部は、ネジ山が潰れて歪んでいることも多いので、ダメだったら再度ダイスを当ててやる。
The cut part often has distorted threads, so if it doesn’t work, I use the die again.
ナットを回してみたが、スムーズに回ったので大丈夫でしょう。
I tried turning the nut, and it turned smoothly, so it should be fine.
では、いよいよ機体に取り付け。
Now, it’s finally time to install it on the bike.
ここも写真を撮影していないけど、マスターシリンダーの直径が小さくなった分、少しオフセットして取り付ける。
I didn’t take photos here either, but since the master cylinder diameter is smaller, I offset it a bit for installation.
エストレヤのロッドはユニバーサルジョイントな構造になっているので、角度がついても動作するように設計されている。
The Estrella rod has a universal joint structure, so it’s designed to work even at an angle.
とはいえ、真っ直ぐになっているに越したことは無い。
However, it’s better if it’s straight.
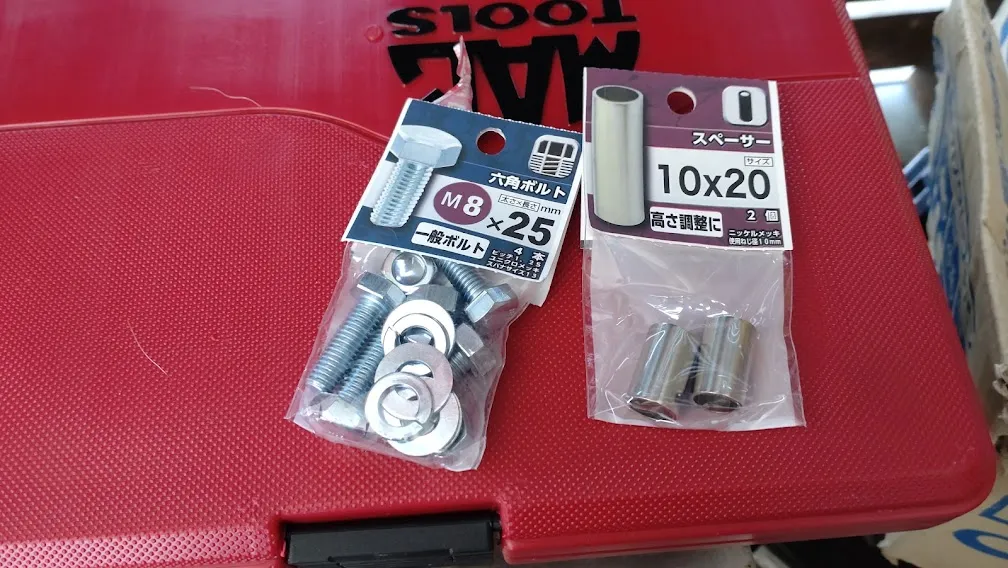
得意のホームセンターで部材を購入してみたが、10mmがなくて20mm。
I tried buying materials at my favorite home center, but they didn’t have 10mm, only 20mm.
しょうがないので10mmにカットして使用。
So, I cut it to 10mm and used it.
カラーが入手できない場合は、ワッシャーを何枚か重ねたらいいんじゃないかと。
If you can’t get a collar, stacking several washers should work.
元々ついていたボルトも、オフセットによって長さが足りなくなったので新調。
The original bolts also became too short due to the offset, so I got new ones.
ステンレスのキャップボルトで固定しようと思ったけど、電蝕でサビることもあるため、ユニクロメッキのボルト(25mm)で固定。
I thought about fixing it with stainless cap bolts, but they can rust due to galvanic corrosion, so I used zinc-plated bolts (25mm) instead.
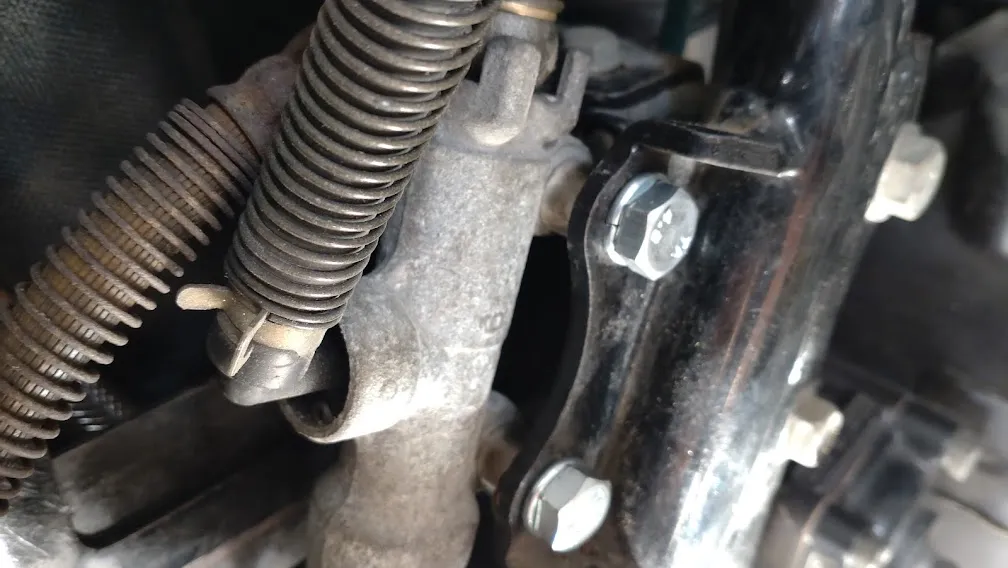
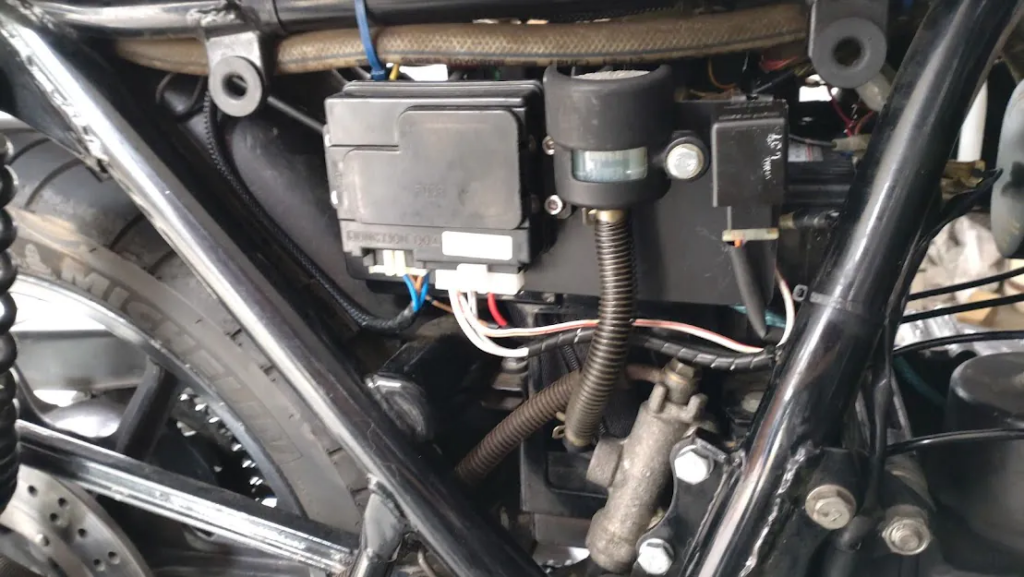
見えづらいけど、スチール製のカラーを入れている
It’s hard to see, but I inserted a steel collar.
ここまで来たら、ほとんど作業は終了。
By this point, most of the work is done.
ブレーキホースをマスターシリンダーに取り付け(ボルトのサイズが変わるけど、従来のホースはそのまま使えるので、心配ない)、ロッドの先端をブレーキペダルに取り付ければ完成。
Attach the brake hose to the master cylinder (the bolt size changes, but the existing hose can be used as is, so no worries), and attach the rod end to the brake pedal to complete it.
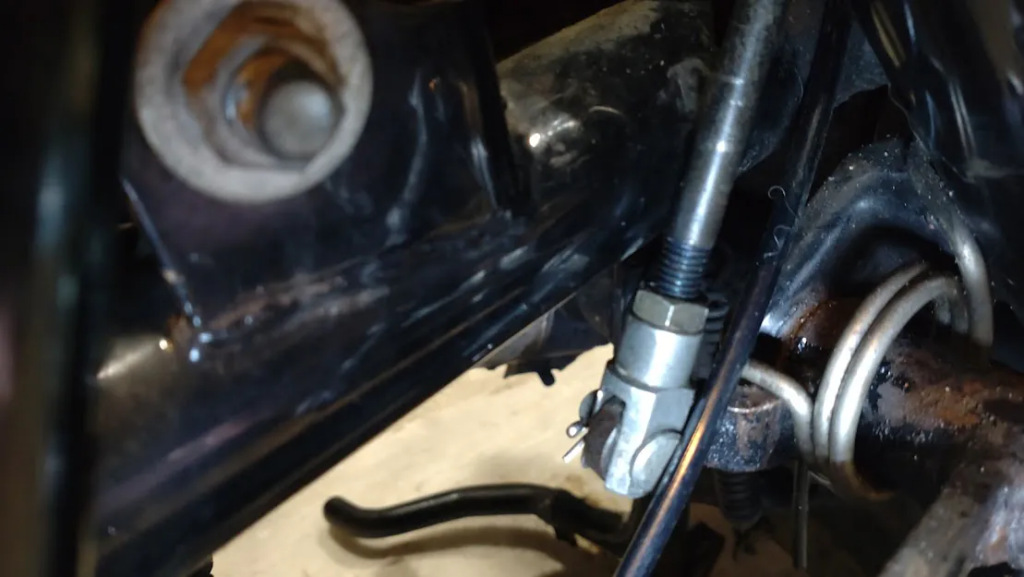
ロッドの径はZ1R純正品と同じなので、ペダルとの接続部はZ1Rから移植。
Since the rod diameter is the same as the Z1R original, I transplanted the connection part from the Z1R.
エストレヤのままでも良かったのだけど、ペダル側の接続部が若干広いので要加工案件。
It was fine to leave it as Estrella’s, but the connection part on the pedal side is slightly wider, so it needed modification.
だったら、Z1Rのモノを使えばいいでしょう、ということに。
So, I decided to use the Z1R’s part.
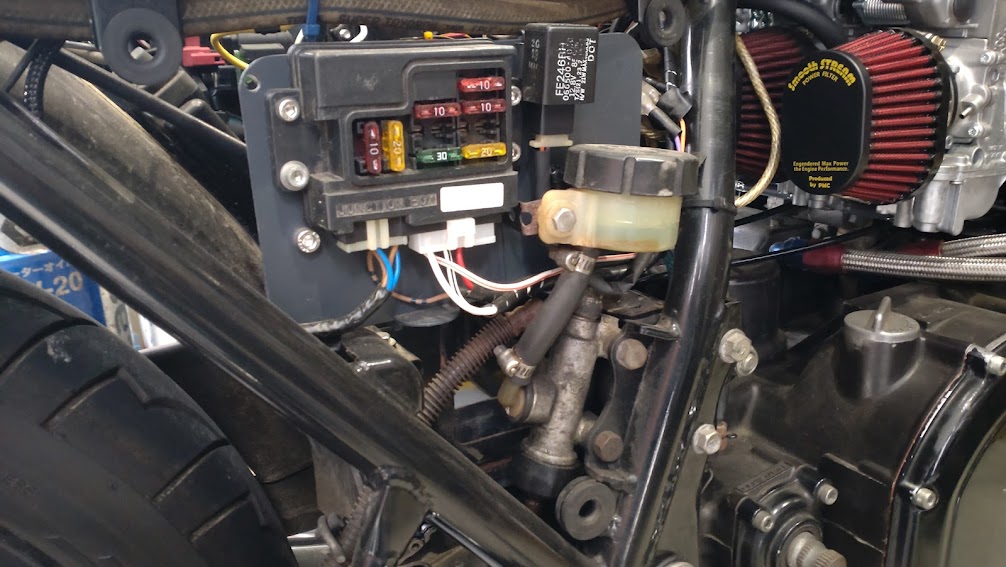
若干、リザーバータンクのホースが長い気がするけど、とりあえず大丈夫でしょう。
The hose from the reservoir tank seems a bit long, but it should be fine for now.
気になる場合はハサミでカットしてやればいいでしょう。
If it bothers you, just cut it with scissors.
リザーバータンクにブレーキフルードを入れ、エア抜きしたら完成。
Fill the reservoir tank with brake fluid and bleed the air to complete it.
エア抜きは、シリンジ(注射器)を使用すれば、時間とフルードの節約になります。
Using a syringe for bleeding saves time and fluid.
しかし、制動装置なので、実際に走り出してみないことには完成とは言えない。
However, since it’s a braking system, it can’t be considered complete without a test run.
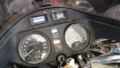
まずはセンタースタンドに立てた状態で、引きずりが無いか、手動で回したタイヤをカチっと停めることができるかを確認する。
First, on the center stand, check for any dragging and whether you can stop the manually rotated tire with a click.
この辺りでフニャフニャしているようだと、走り出したバイクを停めることなど出来ないので。
If it’s floppy at this point, you won’t be able to stop the bike once it starts moving.
そしていよいよ公道で実走。
Then, finally, a real run on the road.
我が家は大通りまで出るためには、車が入ってこれない細い長い坂道を下らないといけないので、そこで停められないようなら、もはやアウトでしょう。
To reach the main road from my house, I have to descend a long, narrow slope that cars can’t enter, so if it can’t stop there, it’s over.
試しにペダルを踏んづけてやったら、見事にロック。
When I tried stepping on the pedal, it locked perfectly.
今までよりも効きが良くなったんじゃないだろうか?
It seems to work better than before.
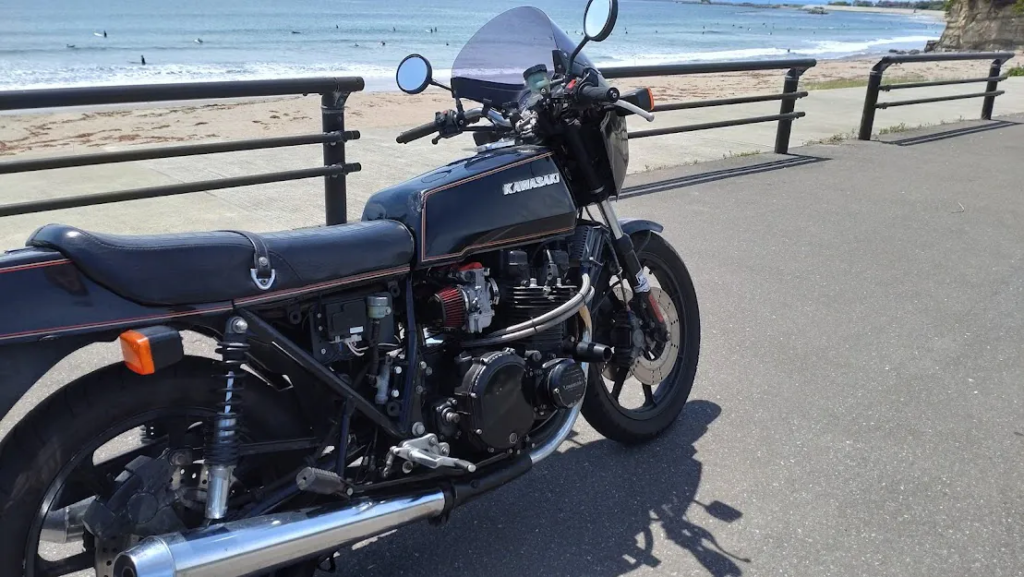
海っぺりのテストコースを走行、特に問題ないので帰宅してみたら…
I drove along a seaside test course with no issues, but when I got home…
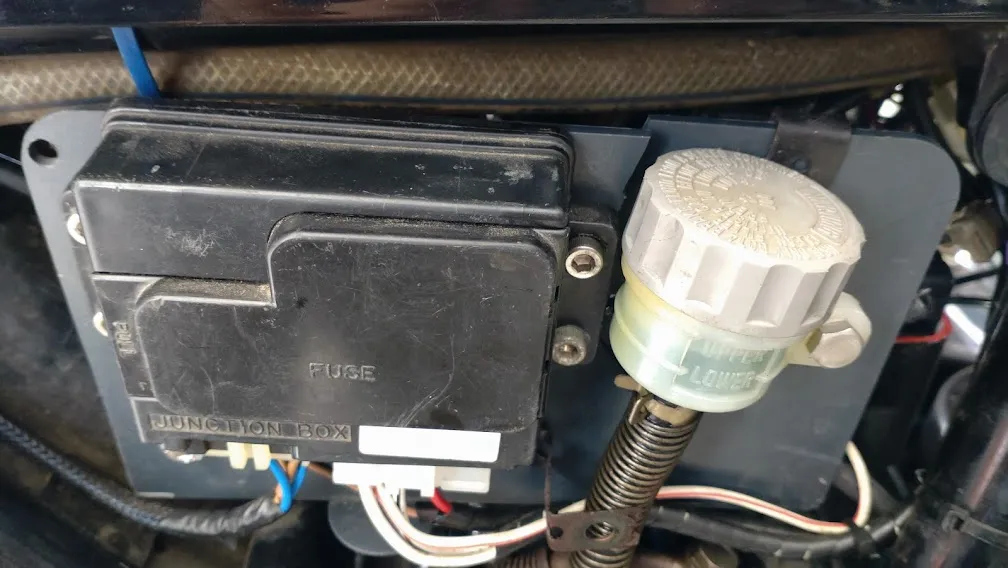
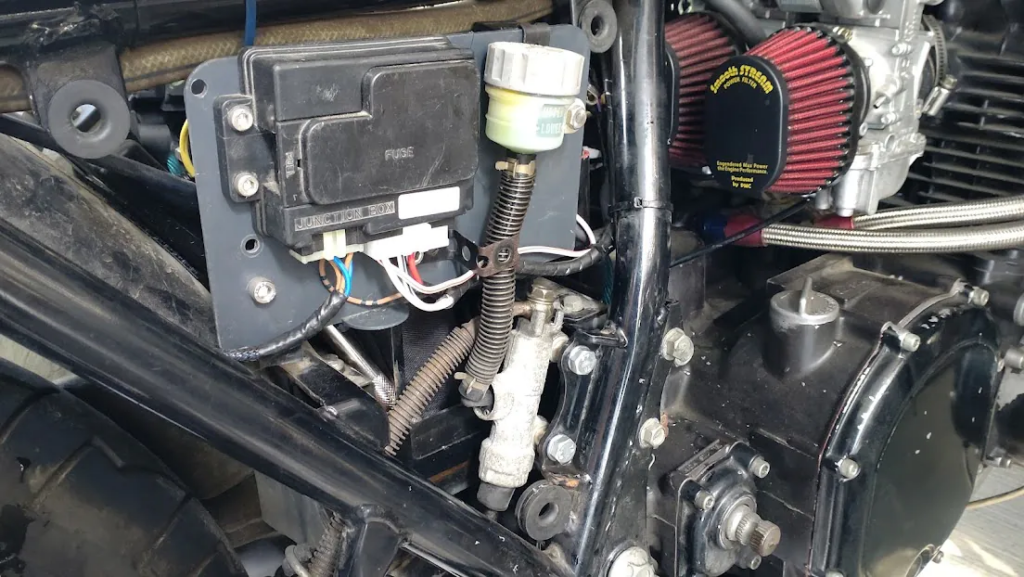
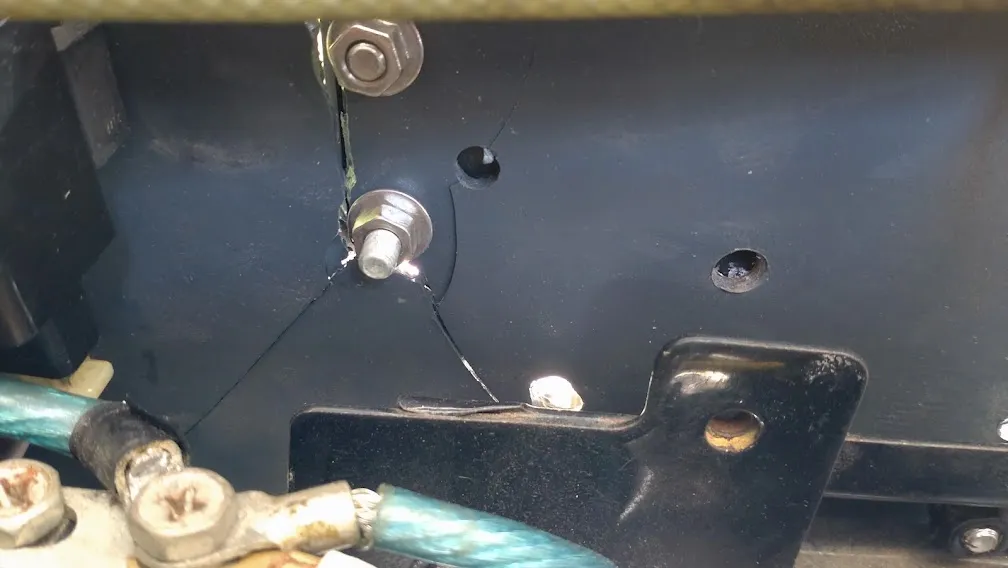
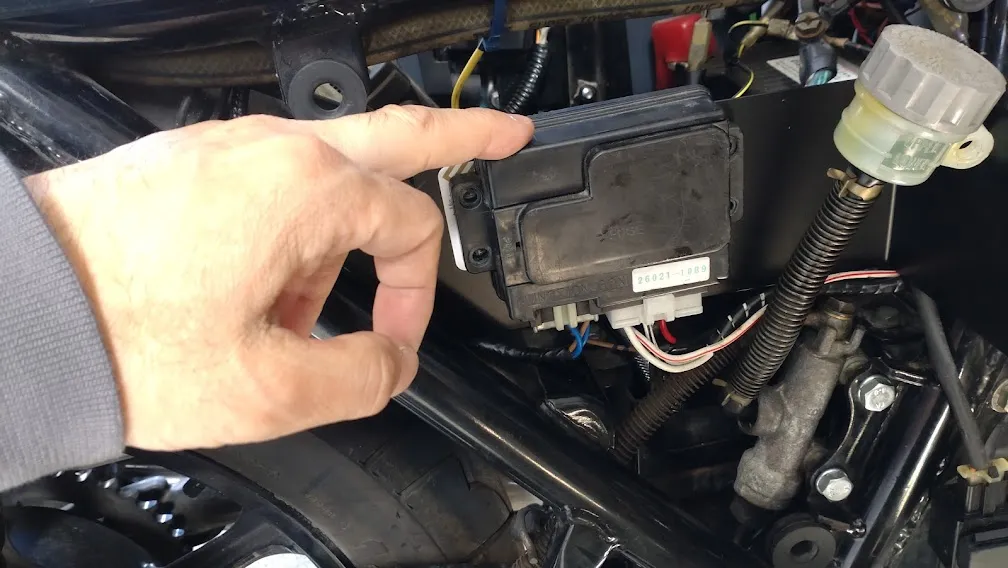
フューズボックスとリザーバータンクをマウントするパネルが割れている…!
The panel mounting the fuse box and reservoir tank is cracked…!
えー?さっき海岸で見た時は何とも無かったハズなのに…?
What? It looked fine when I checked at the coast earlier…?
何かマンガの描写のように割れている…
It’s cracked like something out of a comic…
これではどうしようもないので、マウントを作らなければならない。
This won’t do, so I have to make a new mount.
というわけで、お得意の100均ショップへ。
So, off to my favorite 100 yen shop.
プラ製品で作ると劣化するんだろうか?
Will it deteriorate if I make it with plastic products?
それともリジットマウントすることで振動が加わり、割れてしまうのだろうか?
Or will it crack due to vibrations if I rigidly mount it?
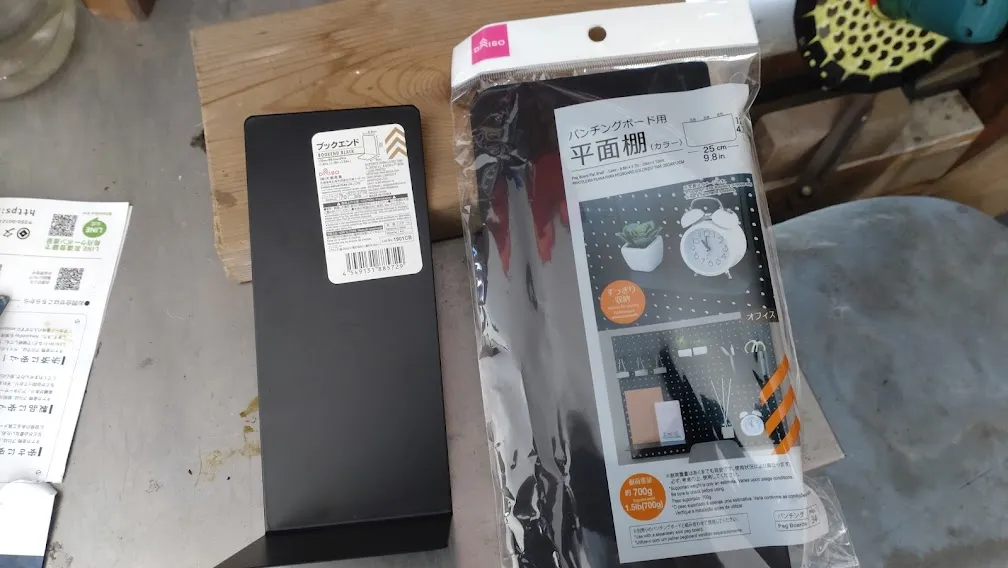
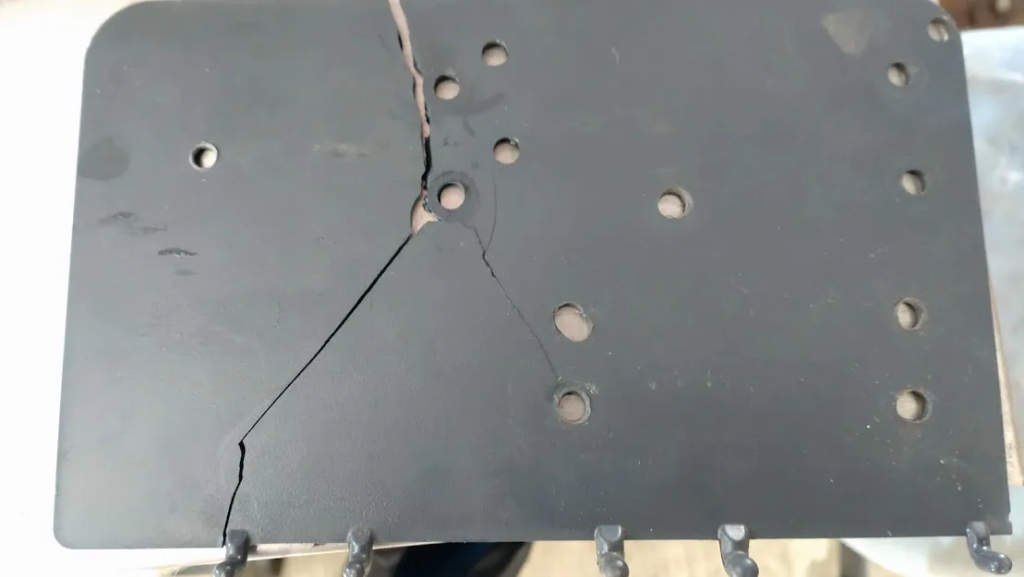
写真右の「平面棚」が、これまで使用していたモノ。
The “flat shelf” on the right in the photo is what I used before.
これ、左側でレギュレーターを固定するのにも使っていて、加工もしやすいからよいと思っていたのだが…
I used this to fix the regulator on the left side, and it was easy to work with, so I thought it was good, but…
写真左が、スチール製のブックエンド。
The one on the left in the photo is a steel bookend.
折れているところから切り飛ばせば、いまと同じ感じで使えるんじゃないかと予想。
I predict that if I cut it off from the broken part, it can be used the same way as now.
こんなイメージで、どうでしょう?
How about this idea?
まだ加工前。
Not yet processed.
折れたところを基準にして、金ノコでガンガン切ってやります。
Using the broken part as a reference, I’ll cut it vigorously with a hacksaw.
加工しやすいのがスチールの良いところ。
The good thing about steel is that it’s easy to work with.
カットしたら切り口を平滑にして、角は丸くしてやる。
After cutting, smooth the cut surface and round the corners.
本当なら焼付塗装してやりたかったけど…塗料が無いので次回にでも。
I wanted to do baked paint, but since I don’t have the paint, I’ll do it next time.
何度か機体に当てながら、穴を開ける位置を確認。
I checked the position to drill holes by fitting it to the bike several times.
金属用ドリルも100均で売っていたので、それを使用。
I used a metal drill I bought at the 100 yen shop.
ボルトよりも直径が小さいので、リーマーで加工してやる。
Since the diameter is smaller than the bolt, I processed it with a reamer.
どういうわけか、キャップボルトが一本どこかへ紛失…ちゃんとトレイの上に載せてたハズなのに、ワッシャーとナットを残して行方不明に(^_^;)
Somehow, one of the cap bolts got lost… I had placed it on the tray, but it disappeared, leaving only the washer and nut (^^;)
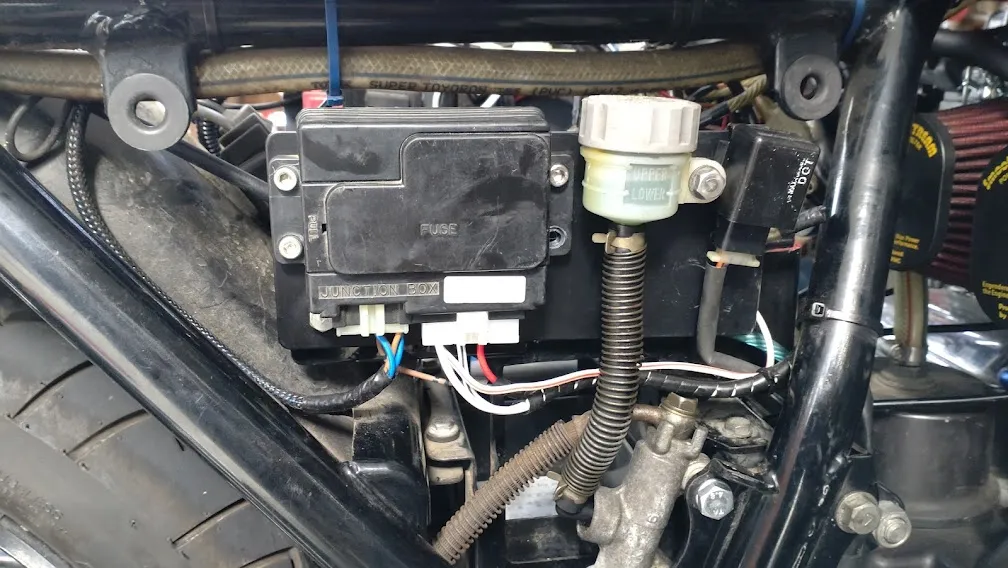
リザーバータンクも、前よりも真っ直ぐになったから、良しとしましょ。
The reservoir tank is straighter than before, so let’s call it good.
■2020年6月20日追記
■ June 20, 2020 Update
そういえば、マスターシリンダーのキャップ(フタ)が脱落しないようにカバーがついていたので、それを装着するついでに、各部の点検。
By the way, since there was a cover to prevent the master cylinder cap (lid) from falling off, I checked each part while installing it.
少しネジ山が余分になってしまったところだけど、焼き入れしたおかげかサビは発生していない(いまのところは)。
There’s a bit of excess threading, but thanks to the hardening, there’s no rust (so far).
コメント